|
Using Task Asset Fields is an ideal way to keep track of the service history of assets, as you can record extra information via Custom Fields on assets added to tasks, based on that particular visit. Examples of fields For example, you might want to include the date of the last service, a measurement, temperature recording, or a photo taken at the time of inspection. You can then use this information on layouts to easily send your clients a service report, as well as use it for reporting purposes. When setting up a Task Asset Custom Field, you can choose to:
Examples of how this can be used For example, you might want an air-conditioner unit to have certain checks in place for an installation task, but a different set of checks in place for a service task. See Use Cases below for more information. Permission Groups
Site Administrators can enable access for those in custom permission groups. Custom permission groupsPermission Groups > [Select permission group] > Custom Fields > Types > Task Assets:
|
 |
 |
Use Cases
If the checks you perform are dependent on the type of asset, consider applying your custom fields to different asset types.
What does this mean?
This means that each asset added to the task could have a different set of custom fields, depending on the asset type.
Example:
|
For Air-Conditioning assets, you want the following custom fields:
|
But for Heating assets, you might want:
|
If the checks you perform are dependent on the type of job, consider applying your custom fields to different task types.
What does this mean?
This means the fields that appear will vary depending on the type of task you're working on, no matter what asset types your assets are.
Asset Types
If this is the case, this will also work if you haven't set up Asset Types for your assets.
Example:
|
On your Service tasks, you could use the following custom fields for every asset:
|
But on your Installation tasks, you might want:
|
If the checks performed on the asset are dependent on the type of work performed as well as the type of asset, you should apply your custom fields to asset types and task types.
What does this mean?
This means that you could have different sets of custom fields for the same asset type, depending on which task type was selected.
Example:
|
For Air-Conditioning assets, you want the following custom fields to appear for Service tasks:
|
But for Installation tasks, however, Air-Conditioning assets should have:
|
If you have the same checks on assets no matter what type of task you have or what type of asset, don't specify which task types or asset types to apply when creating your custom fields.
What does this mean?
This means that you will have the same custom fields for every asset, and no matter what task type you're working on.
Asset Types
If this is the case, this will also work if you haven't set up Asset Types for your assets.
Create a Task Asset Field
Before using this feature, you first need to set up your task asset fields:
- In Site Admin, go to Settings.
- Use the search box to find Task Asset Custom Fields (under Assets)
- Click Add Custom Field
- Complete the fields and options as explained in the table below.
- Click Save Custom Field.
Archived Custom Fields
If you add a new custom field with the same name as an archived field, it will reactivate the archived field.
Explanation of fields
| Field | Description |
|---|---|
| Field Name | Enter a field name / label that describes what information is required. |
| Type | Select the type of field from the list: Text box, Numeric, Documents and Photos, Date field, Checkbox, Radio, Select, Multiselect, Text area, Barcode. See Custom Field Types for a full explanation of all types. |
| Radio/Select Val | This is primarily used for Radio and Select types. Enter a list of values you want to appear as a radio button or list selection. These values must be separated with a comma, e.g. Yes,No,N/A |
| Length | Set a character limit for the custom field. The character limit for text fields is 2000 characters. |
| Show in Field |
Allow field users to access custom fields according to the following levels of access:
|
| Asset Type |
Select the asset types this custom field should apply to The custom field will apply to all asset types if you don't make a selection. |
| Task Type |
Select the task types this custom field should apply to The custom field will apply to all task types if you don't make a selection. |
| Is Required |
Enable this option if this field needs to be filled out before a task can be marked as Completed. By default, only fields set as Required will display for each asset as a reminder to fill these out. |
Edit Task Asset Fields
To edit existing task asset fields:
- In Site Admin, go to Settings.
- Use the search box to find Task Asset Custom Fields (under Assets)
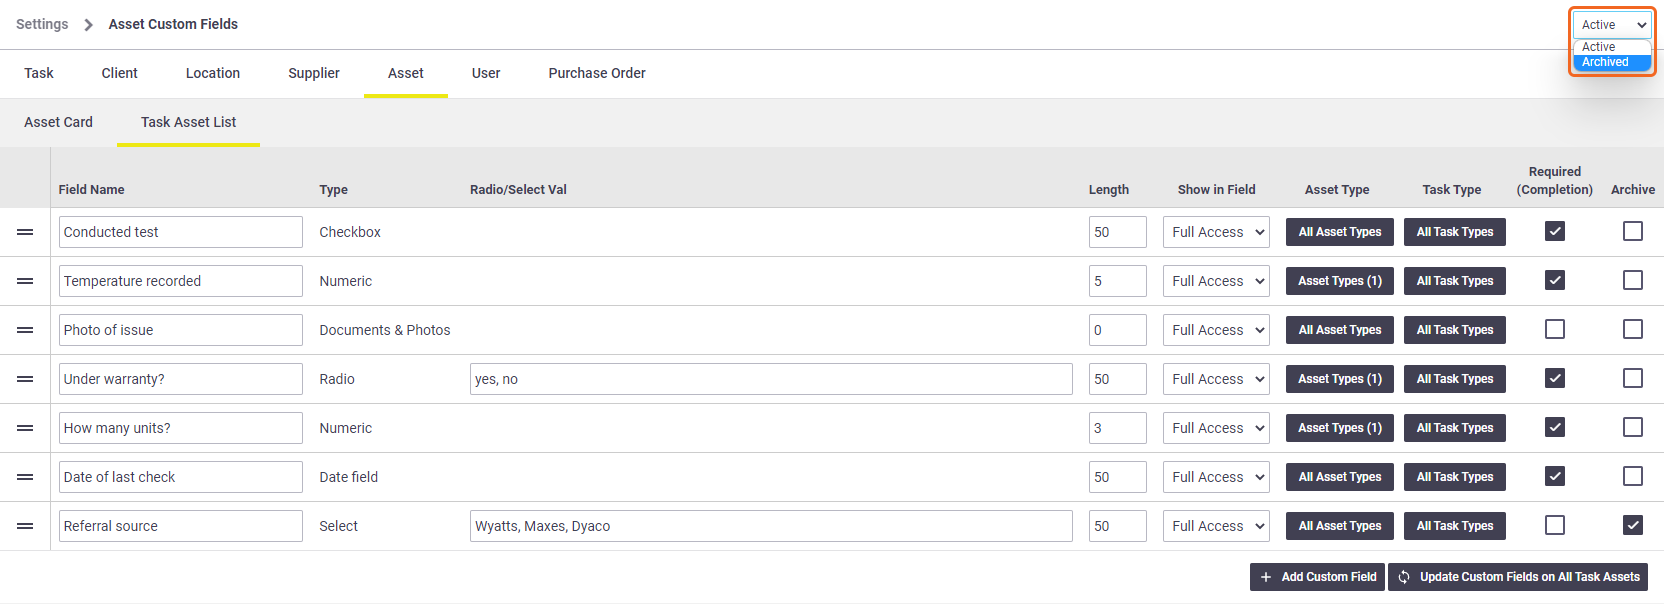
Alternatively, in the Custom Fields settings, click Asset and then click the Task Asset List tab.
- Make your changes, as described above
- Save Asset Custom Fields.
Reorder
Use the  (two bars) to reorder items in the list.
Update Task Asset Fields
Once task asset custom fields have been set up, they will automatically appear for assets added to new tasks, depending on the scenario (e.g. asset type and/or task type).
Clicking Update Custom Fields on All Task Assets will:
- update open tasks with changes to custom fields already existing on the task
Newly created custom fields will not appear on existing tasks; only tasks created after the custom field has been saved.
- update periodic task templates with all custom field changes, including newly created custom fields.
Changing task types
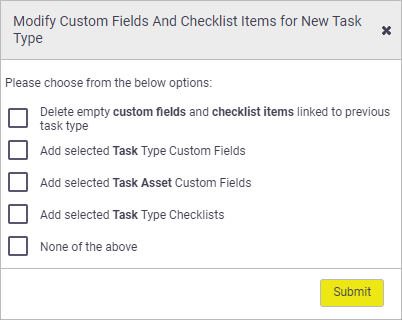
If you change the task type on an existing task, you will be given an option on how you want to proceed, depending on the scenario. You can choose more than one option, or choose 'None of the above'.
|
 |
||||||||||||
 |
Archive Task Asset Fields
To archive a task asset field, click the checkbox under the Archive column and Save.
To restore a field that has been archived, click the dropdown filter at the top right of the screen and select Archived. Uncheck the Archive checkbox and Save.
