Scheduling a task in AroFlo is made easy either using our robust calendar, or from within a task.
If a user's timesheet has been approved for the day or week, you will not be able to schedule events to them for that day or week. See Add Timesheets for more information.
What would you like to learn about?
How Do I Schedule via the Calendar?
Scheduling via the calendar is a simple three-step process. Click on the links below for detailed instructions.
1. Block out some time on the calendar.
|
On the calendar, click and drag to block out some time on the day, time and resource you need. In the image below, we've clicked on 8am and dragged to 10am. 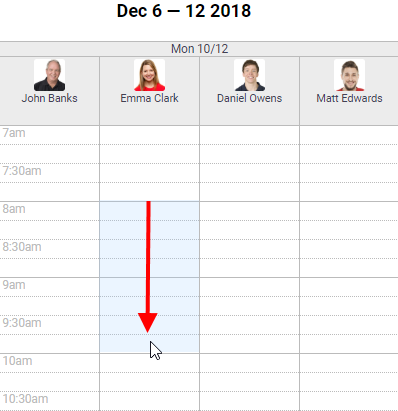 |
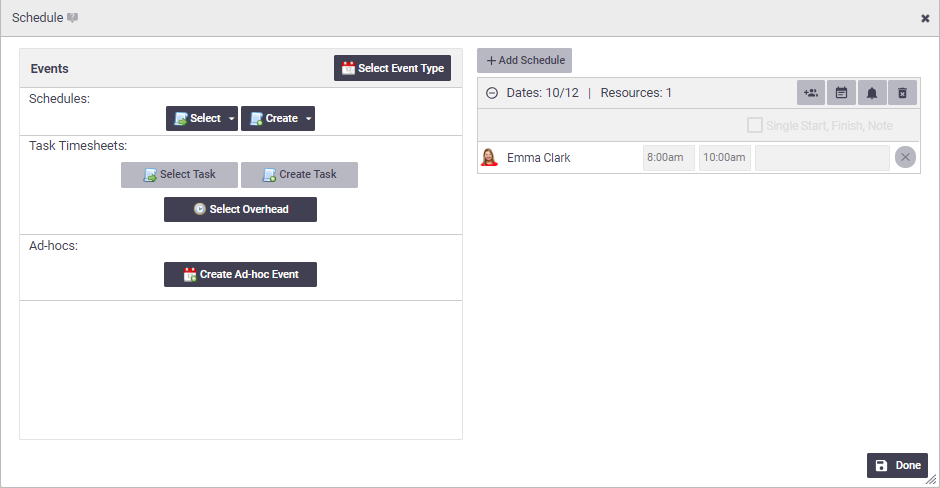
When you let go of the mouse, the Schedule window appears with the options shown below.
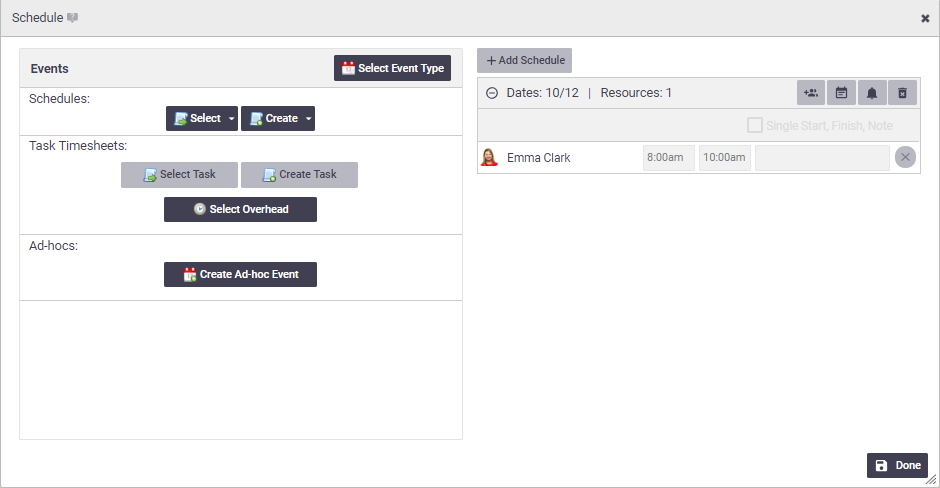 |
To change the date of the schedule, click  (calendar icon) and select a date.
2. Choose the event type from the left of the Schedule window.
Before you can save the schedule, you must select an event type (left-hand side of Schedule window). The table below describes the event types you can choose.
| Events | Allows you to… |
|
Schedule > Select: - Task/Quote |
Select an existing task. 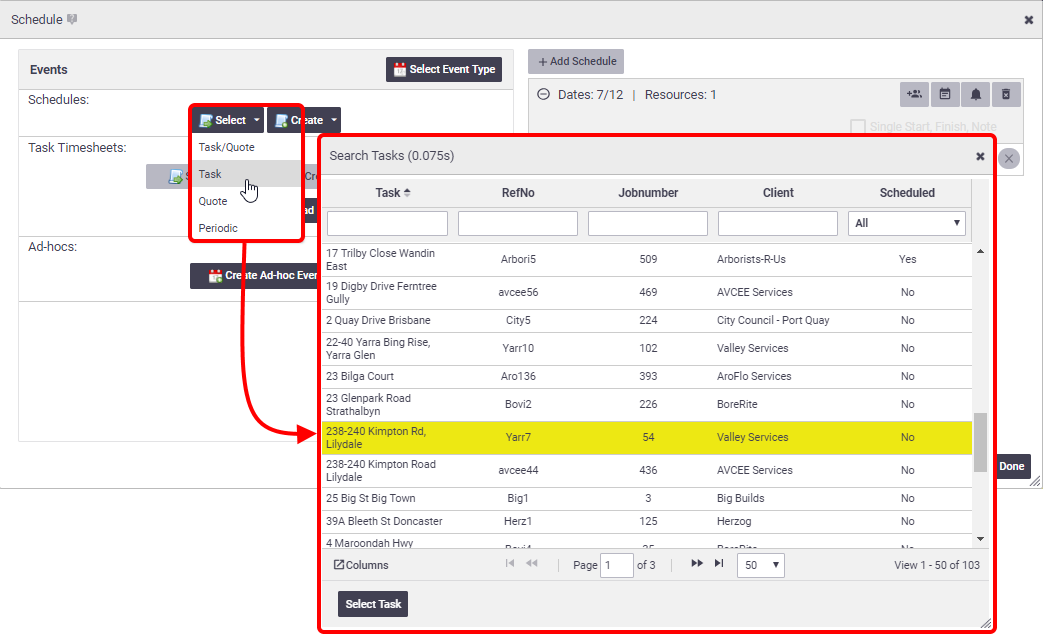 Using the filters You can also use the filters at the top and type using keywords to easily find existing records. Click on |
|
Schedule > Create: - Task |
Allows you to create a Task directly from the calendar if you don't have one to use already. 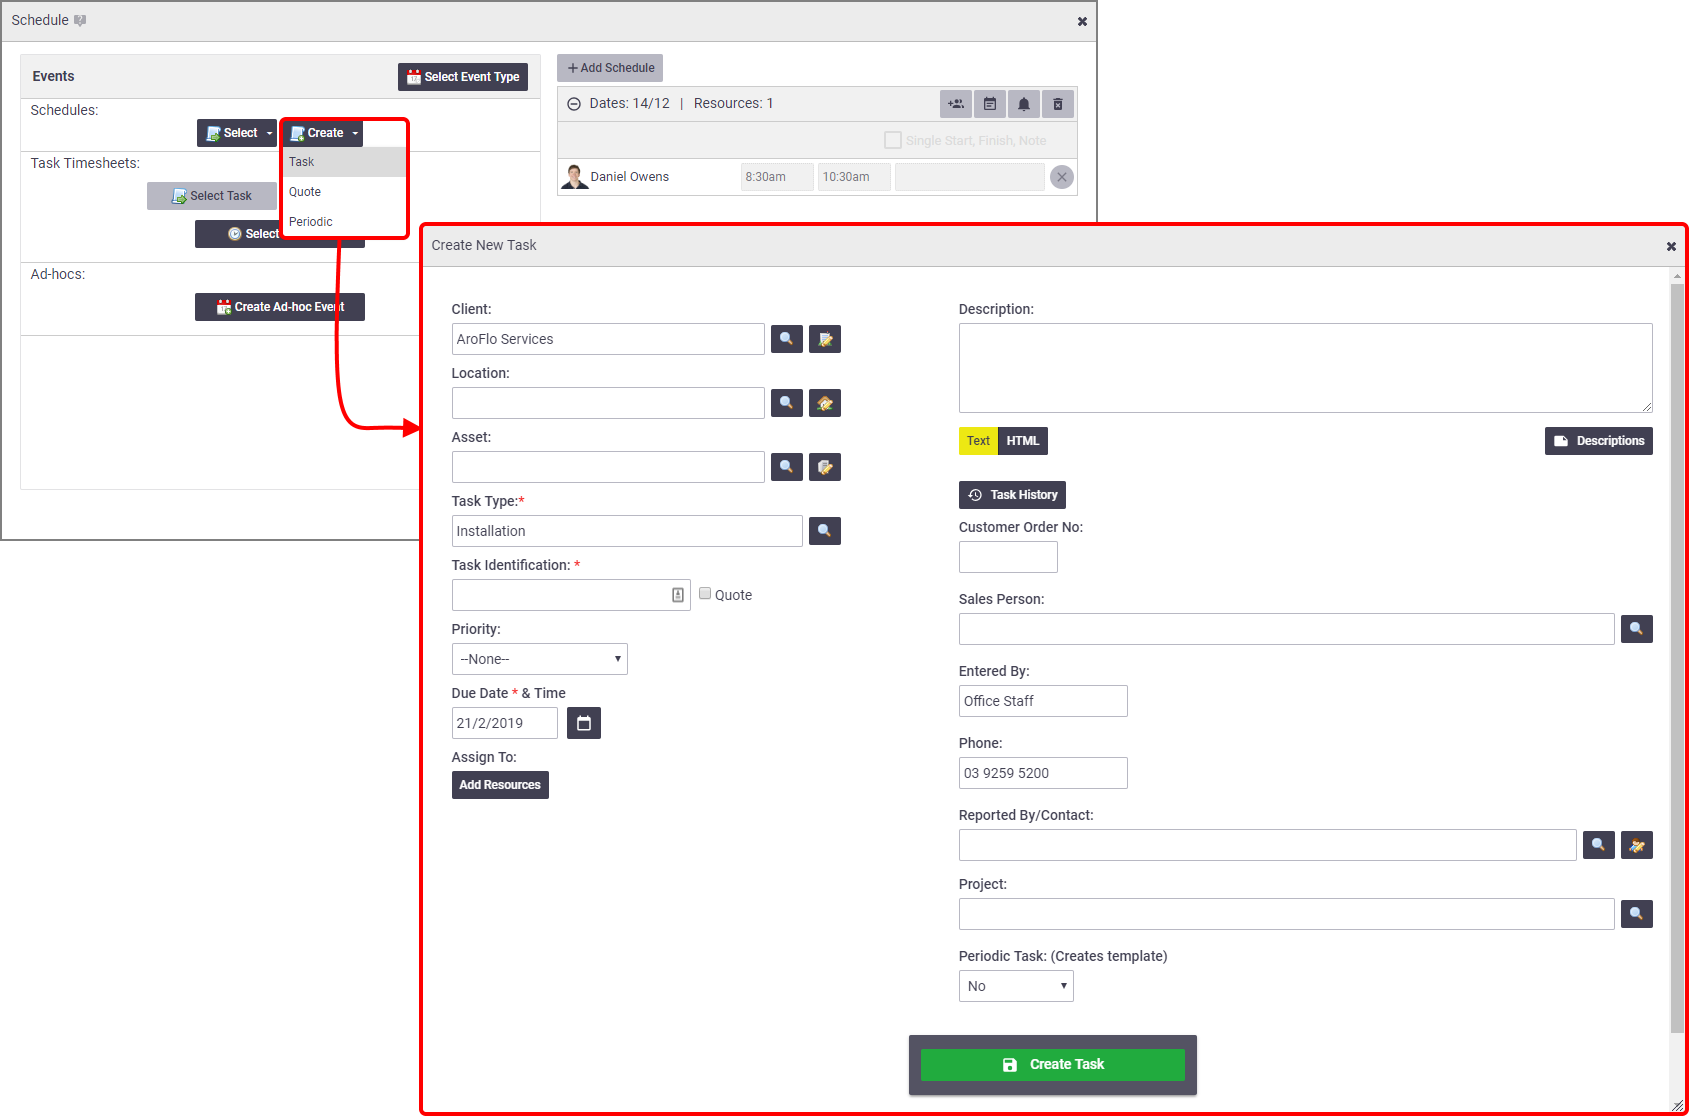 |
|
Task Timesheet > Select Overhead
|
Select a timesheet overhead, such as annual leave, public holiday, or trade school. The list of overheads is configured in Site Administration. If changes are required, please contact your Site Administrator. Other timesheet optionsTwo options within the Task Timesheets area may appear as unavailable: 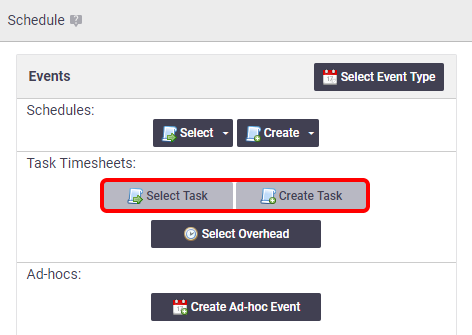 To enable these options, go to your calendar settings and tick Show Task Timesheets in the 'Event Types' area. 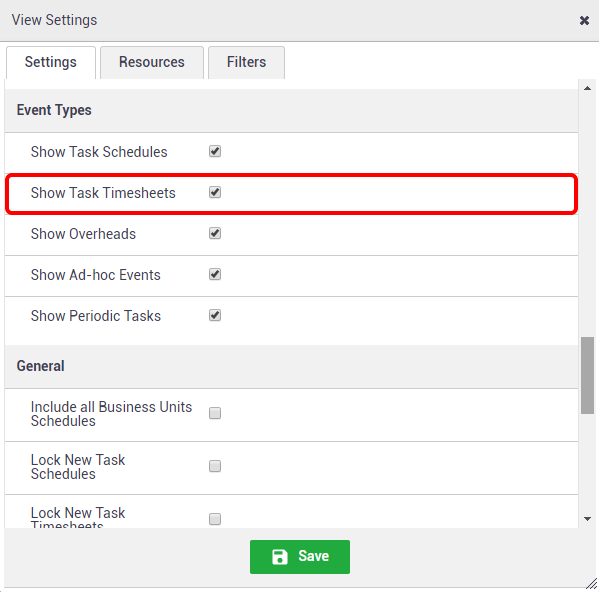 The Select Task option allows you to record labour against a task that you select from the task list.
The Create Task option allows you to create a task and record labour against it, within the schedule window. |
|
Ad-hocs > Create Ad-hoc Event
|
Set a calendar entry for something other than a task, quote or periodic. For example, meetings, training sessions, personal errands, or reminders. Field staff can see ad-hoc events in their scheduled task list in AroFlo Field, which makes it a useful tool for broadcasting important messages. |
Event Details
- The event details appear on the left-hand side of the schedule window.
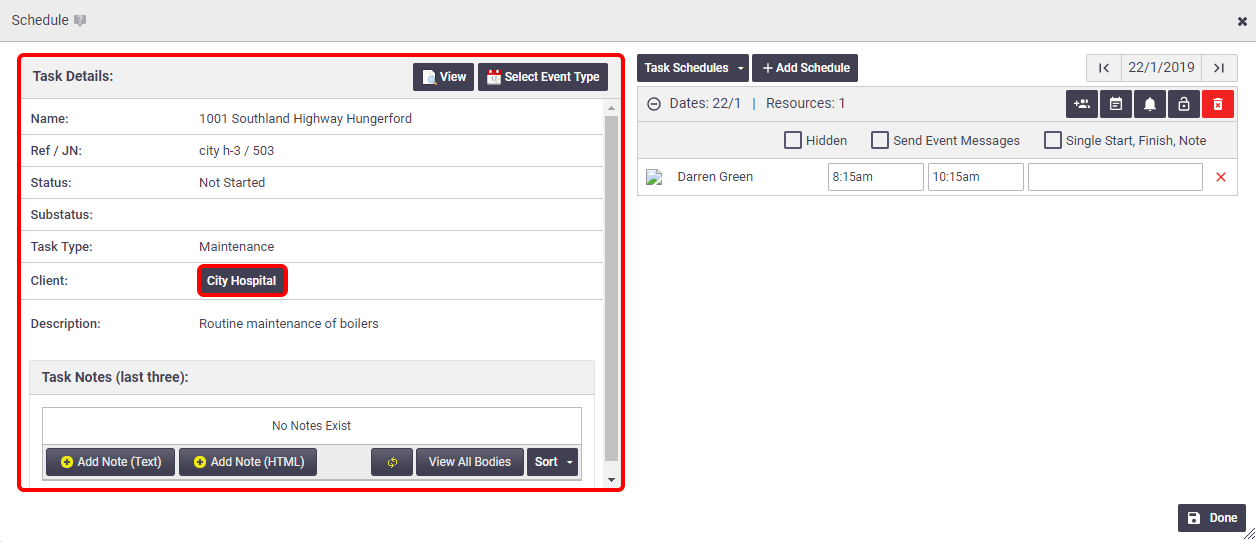
- If there are any task notes recorded, the last three will be displayed on the left-hand side of the schedule window under the task details.
- To access the client card, click the client name button located in the middle of the schedule window.
Choose your resources, dates and times from the right of the Schedule window.
Depending on your calendar view, your schedule may already contain the name of a resource and the date and time of the event. For example, if you have your calendar view set to 'Time > Week by Resource', as we have in the example below. In this case, just click Done, and your schedule is confirmed.
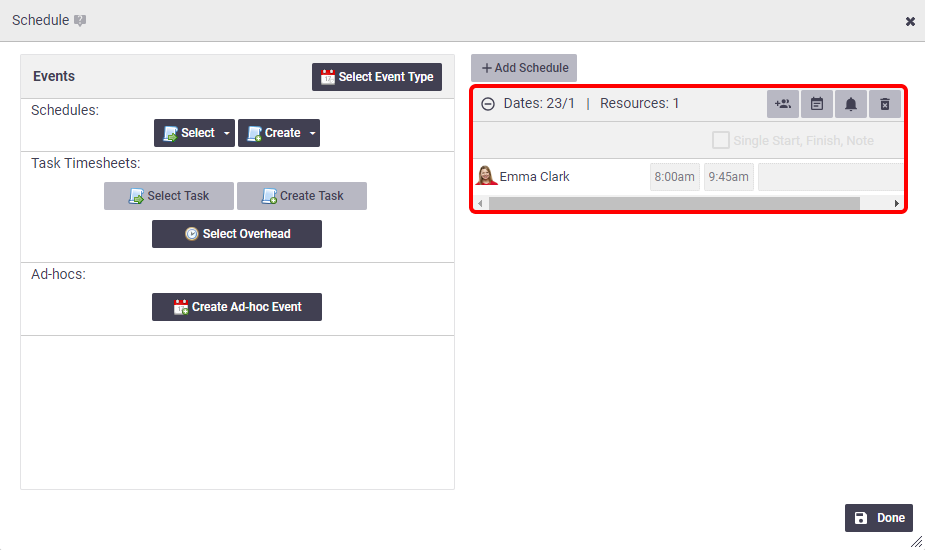
If there is no resource or time shown on the Schedule window, or you want to add further resources:
1. Click the  (two people) icon.
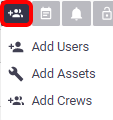
2. Click the option you need from the dropdown menu and make a selection from the Search window that appears.
 |
Option
|
Allows you to…
|
|
Add Users
|
Add one or more users (resources) to the event.
|
|
|
Add Assets
|
Add one or more assets to the event. (Not available in Go).
|
|
|
Add Crews
|
Add a crew to the event.
|
You can add as many users, assets or crews as you need to.
3. Optional: Enter a schedule note.
4. Click Done.
Scheduled time vs actual time
Task schedules entered into the calendar are a schedule guideline only. Staff are required to record their actual time when they complete the job in the field, and these are timesheet entries. AroFlo uses actual hours booked on a task (not scheduled hours) to calculate profit and loss.
The calendar also offers an alternative way of scheduling. Click below to learn more.
Drag and drop scheduling
An alternative way to schedule existing tasks is to drag and drop them onto the calendar via the ![]() (plus icon).
(plus icon).
- Click the
 (plus icon) in the lower right of the screen.
 - Click Add Task to Schedule.
- Click a task and drag it into position on the calendar.
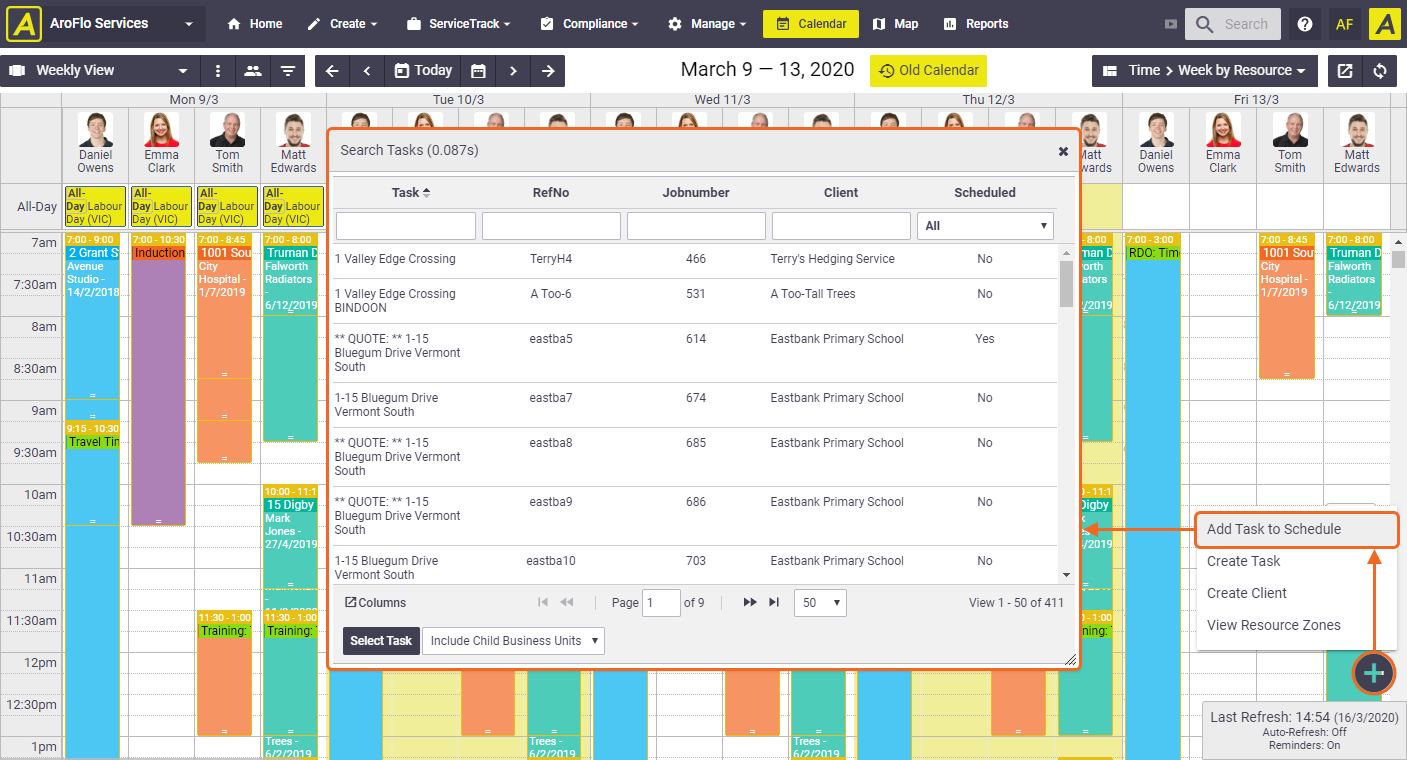
If a task schedule drops into the wrong position, you can easily move it by clicking and dragging the schedule to the correct position on the calendar.
- When you're done, click X to close the Search Task window and the pop-out menu.
How Do I Schedule via a Task Worksheet?
You can get to the Schedule window from within a task, quote or periodic task.
| Area | Where to find the schedule window |
| A task or quote you are creating and have not yet saved. |
The schedule window is open by default in the New Task / New Quote screens. Look for it under the Task Schedule / Quote Schedule heading.  |
| A task you have saved |
Scroll to the bottom of the task and click Create Task Schedule. 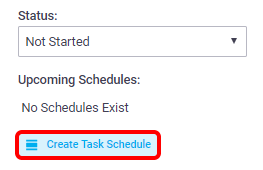 |
1. Click the  (two people) icon.
2. Click the option you need from the dropdown menu and make a selection from the Search window that appears.
 |
Option | Allows you to… |
| Add Users | Add one or more users (resources) to the event. | |
| Add Assets | Add one or more assets to the event. (Not available in Go). | |
| Add Crews | Add a crew to the event. |
You can add as many users, assets or crews as you need to. Click the X in the top right of the Search Users window to close it.
3. Optional: Enter a schedule note.
4. Click Done, Save, or Create Task/Quote, as required.
How Do I Use the Scheduling Window?
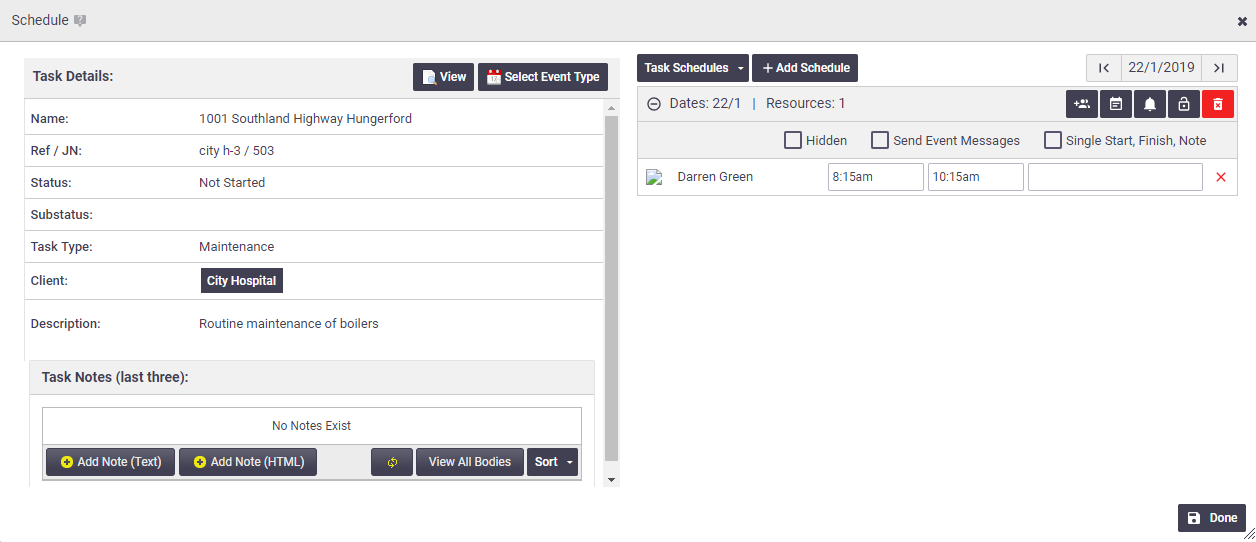
Schedule groups
When multiple resources are selected within the same schedule block, it is called a 'schedule group'. Schedule Groups allow you to edit and move a group of resources easily on the calendar. Within each schedule block, you can add as many resources as required.
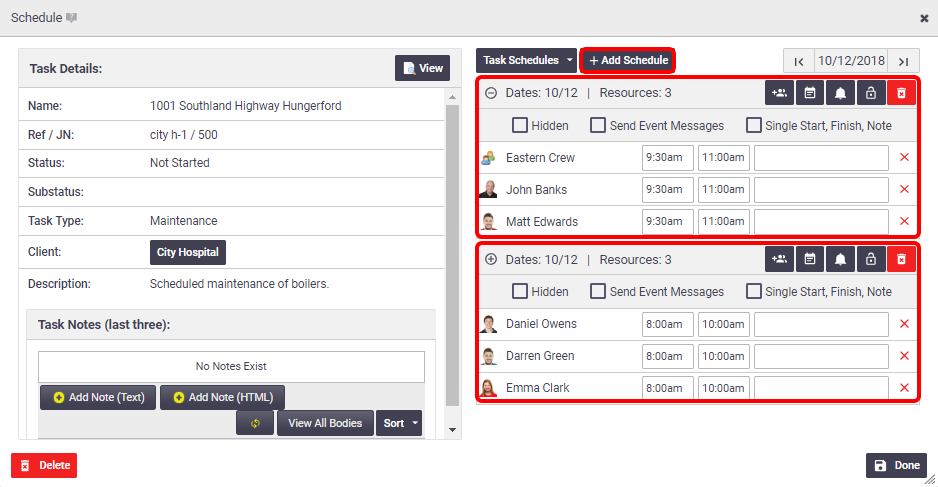
To create separate schedule blocks that can be moved independently of each other, click the Add Schedule button and a new schedule block will appear, allowing you to select resources and enter times and notes.
The image below shows an event with two schedule groups. This can be handy for jobs that run over multiple days, or where you need different staff to turn up at different times.
Schedule Options
The table below describes the options within the scheduling window.
|
Option
|
What it does
|
Add resources to schedule: 
|
Opens a drop-down menu from which you can add resources (people), assets (Not available in Go), or crews (people plus assets) to the event. |
Show/Hide Calendar: 
|
Opens a date picker from which you can select additional dates or change the date of the event: - click and drag to select multiple consecutive dates, or |
| Add/Edit Schedule Reminders: |
The use of this feature requires an event message to be set up for the Schedule Reminder Template and/or Schedule - Create types.
Before saving a schedule, this icon allows you to schedule an email, SMS or desktop alert at a range of times either before or after the event. Refer to Event Messages for detailed instructions on setting this up.  After saving a schedule and re-opening the event in the calendar, this icon gives you a drop-down list from which you can send:
- schedule reminders
If your general Calendar settings Edit Schedule Event Message setting is set to Automatic, this process should work autonomously, or you can choose to set it to Manual and then have the choice of ticking Send Event Messages or not upon creation of your schedules. |
Lock/Unlock Schedule: 
|
Allows you to lock the schedule so it can't be inadvertently altered. To lock a schedule, click the padlock and then click Done. |
Delete the schedule: 
|
Allows you to delete just the scheduled date and time, not the entire schedule. To delete the entire schedule, use the Delete button on the lower left of the schedule window. 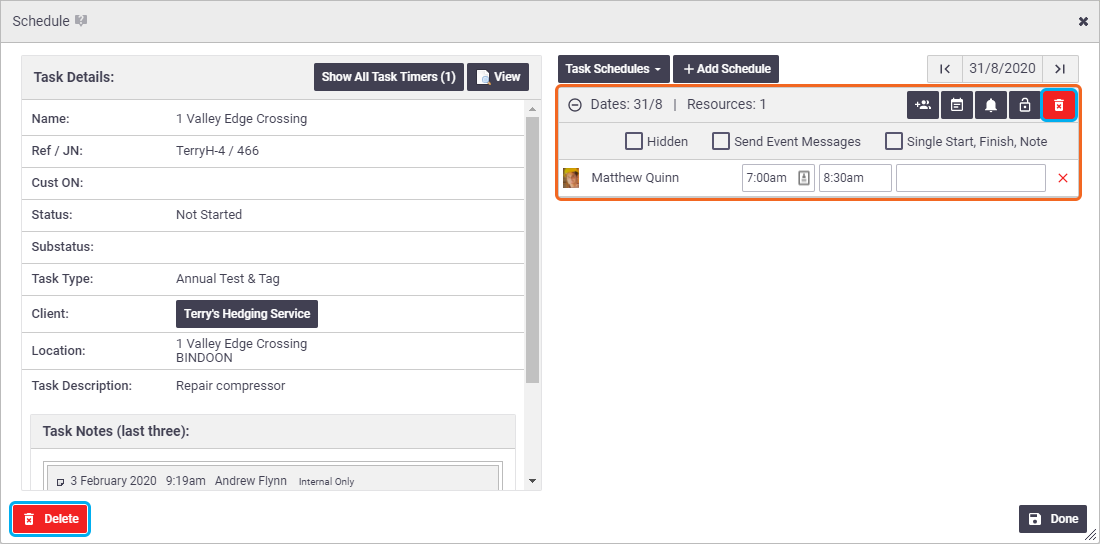 |
| 'Hidden' checkbox |
Allows you to hide a schedule from users. This can be useful for schedules that are not yet confirmed. The user who created the schedule will see a transparent calendar entry, but the user(s) listed on the schedule cannot see it at all until it is unhidden. 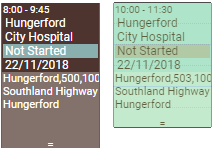 |
| 'Send Event Messages' checkbox | Automatically sends event messages for certain changes to the schedule if your subscription permits this. See Event Messages for set-up instructions. |
| 'Single Start, Finish, Note' checkbox | Allows you to copy the time from the first resource to all resources within the group, and to make sure any schedule notes you enter appear for all resources within the group schedule. This saves you from having to change these details individually. See Enter a schedule note for more information. |
Group vs Crew
What's the difference between a 'group' and a 'crew'?
- A group is a one-off grouping of resources, assets or crews for a particular event. You create a group within the Schedule window, as shown in Schedule Groups, above.
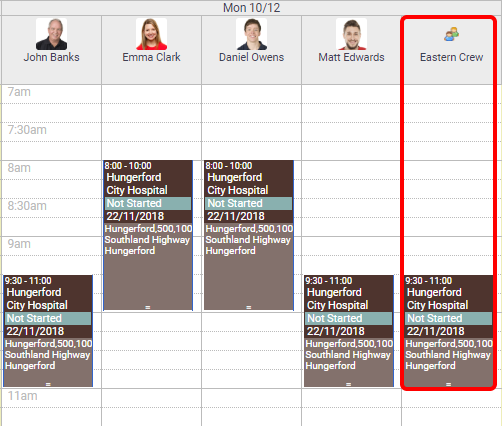
- A crew is a group of resources and/or assets that regularly work together and which you can schedule as a single resource. You create a crew in the calendar settings. An example of a crew could be a couple of resources (i.e. people), their vehicle, and the equipment they routinely use. In the image below, the Eastern Crew has been added to the calendar view, just like any other resource.
How Do I Change a Schedule?
AroFlo gives you plenty of flexibility in working with your schedules. Check out the following pages for instructions on how to:
 to display other filters.