|
GPS Live Tracking is a great way to track the location of your company’s mobile devices. It works in much the same way as setting up a supported GPS tracking unit, with the same live-tracking benefits, and uses the Traccar Client app. GPS Live Tracking is perfect for scenarios such as:
Sensor DataThis feature pulls in sensor data from your device by using your device's built-in activity-detection. Although it doesn’t provide as much data as a vehicle tracker (such as harsh driving), the sensors show useful information such as:
|
 |
 |
Before setting up any devices, we recommend checking out our GPS Tracking Overview page for pricing information. GPS Live Tracking via App is a subscription add-on.
There are three steps involved in setting up a mobile device as a GPS tracker:
- Create an Object in AroPoint and set up a Tracker ID for the device
- Set up GPS tracking on the device and assign the Tracker ID
- Link the Object to an Asset in AroFlo.
Create Object in AroPoint GPS
|
Set up an Object in AroPoint GPS, ensuring you create your own Tracker ID. Tracker ID name A good name might be the device name and/or model, however, ensure the name does not include any spaces and that it's not already in use. See more on creating an Object If you want the sensor data displayed on the map, click the Sensors tab and select ‘Mobile Devices’ from the dropdown. Remember to Save. |
 |
|
|
Set up GPS Tracker app on your smart device
On the device that you're wanting to track:
- Download the Traccar Client app


- Open the app and enable Continuous tracking
- Tap Change settings
- Tap the
 (QR code scanner) option at the top and scan the below QR code to automatically apply the below settings
 - The Device identifier will say 'changeme'. Ensure to update this to match the Tracker ID that you created for the Object in AroPoint GPS (e.g. ‘GalaxyS22+’ in the above example).

Can't scan the code?
If you're having trouble scanning the code, or if you prefer to enter the settings manually, please follow the below instructions:
- Enter the Device identifier to match the Tracker ID that you created for the Object in AroPoint GPS (e.g. ‘GalaxyS22+’ in the above example).
- Set the Server URL to http://gps.aroflo.com:6055
- Set Location accuracy to Highest
- Set Distance (meters) to 100
- Set Interval (seconds) to 30
- Set Angle (degrees) to 15
- Set Stationary heartbeat (seconds) to 120.

More info
This means that this will trigger a location update every 100 metres, or if it has been more than 30 seconds, or if the heading direction has changed more than 15 degrees. This matches standard hard-wired GPS units.
These parameters can be increased or decreased, based on preference. Greater reporting frequency will result in reduced battery life.
Alternatively, the Location accuracy can simply be set to High, which will cause a report to be sent every 100 metres, ignoring the other triggers.
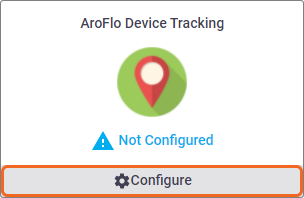
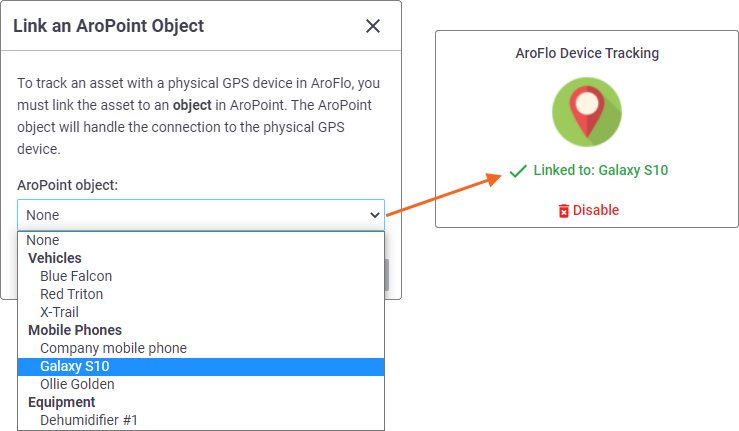
Link Object to an Asset
The asset will save and be shown on the Live Map. Show this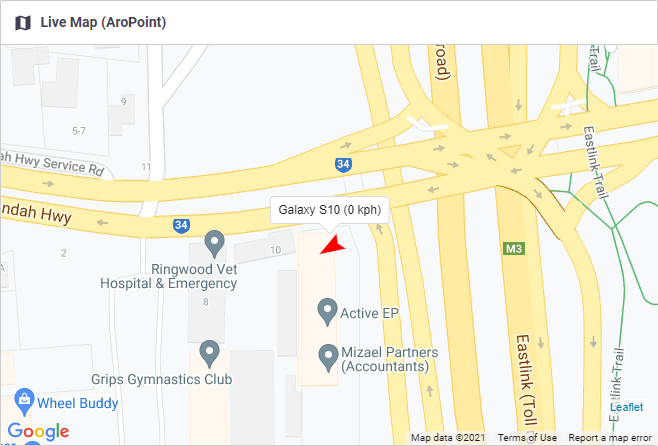 |
 |
|