|
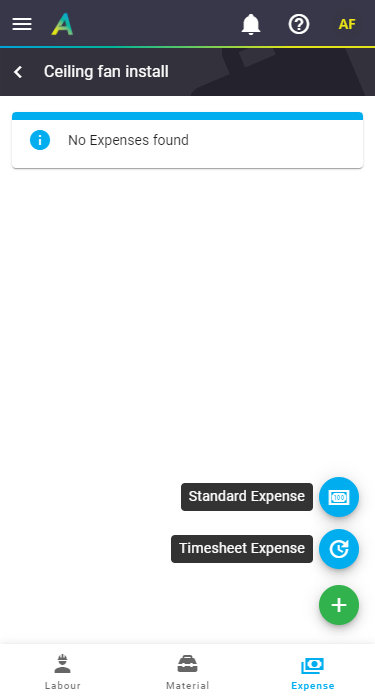
View expenses incurred on a job by tapping:
Expense items can be recorded as a standard expense on the job or a timesheet expense which is reimbursable to an employee. There are two types of expenses:
Permission Groups Any user can view their own timesheets and enter their own expenses. Users in the Supervisor and Management Permission Groups can also view timesheets for other users and enter expenses on their behalf. Custom permissionsFor custom permission groups, Site Administrators can set visibility via Permission Groups > Users > Filters > Current User and Permission Groups > Timesheets > Fields > Users > View. Interested in learning through an interactive course in the AroFlo Academy? To record an expense from any of the two above areas, tap Alternatively, if you want to quickly add an expense to your task without first viewing existing ones, you can also use the Task shortcuts |
 |
 |
Feature Access settings
How expense items are displayed once added depends on your Material and Expense visibility set within your Feature Access Settings, e.g. whether or not prices are showing.
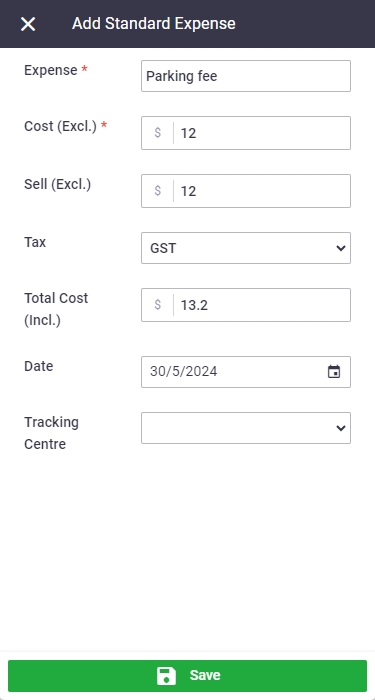
Standard Expense
Explanation of all fields
|
 |
||||||||||||||||
 |
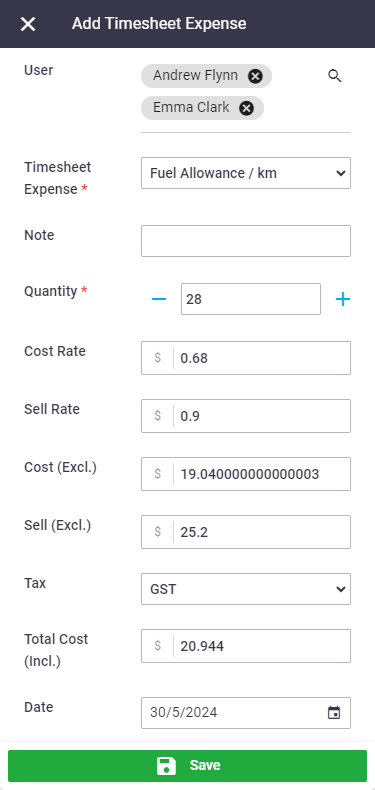
Timesheet Expense
Additional fields available to Admin users only If you're a Management user, you will see additional fields that allow you to enter a Total Cost (Incl.) value, i.e. total receipt value. The Cost (Excl.) value will back calculate based on the selected Tax code. Management users also have the option to enter an estimated Sell Rate and/or Sell (Excl.) value for invoicing purposes. Timesheet expenses can only be added or edited if the user's daily or weekly timesheet has not yet been approved/signed off. If you need to add or edit a timesheet expense after timesheet approval, the approval must be reversed. See Add Timesheets for more information. Explanation of all fields
|
 |
||||||||||||||||||||||||||
 |
Upload documents / photos to expenses
|
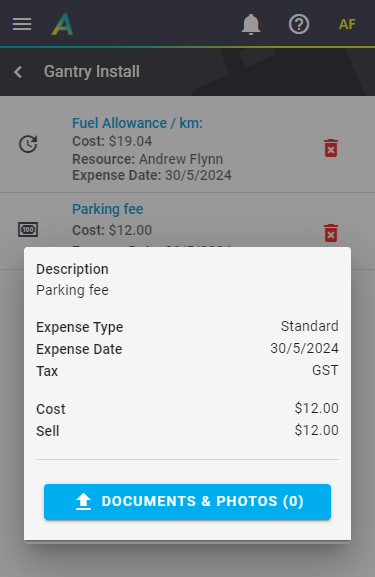
Expense records will be listed in the expenses section. You can upload supporting documentation such as a photo of a receipt to the expense at any time.
Tap < at the top left to return to the expenses list. |
 |
 |
Delete expense entries
|
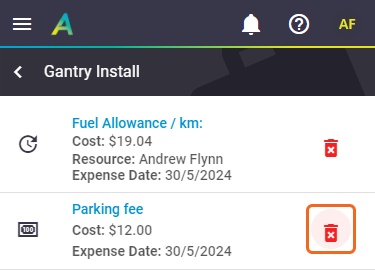
Users in the Worker permission group can only delete expense that they have entered, while Management users can delete all expenses. To delete an expense, tap A Worker cannot delete timesheet expense entries once their daily or weekly timesheet has been approved/signed off. |
 |
 |
 (plus) and
  (minus) buttons to increase or decrease the quantity.
 (red trash can) > Delete.