AroFlo users can manage their billing or company account information using a dedicated Billing Portal.
- View your AroFlo invoice history
- Pay outstanding invoices
- Check when your next invoice will be generated
- Manage contacts and company details
Who has access to the Billing Portal?
By default, the user who is the manager of the top-level business unit will have access to the billing portal.

Interested in learning through an interactive course in the AroFlo Academy?
Access the Billing Portal
|
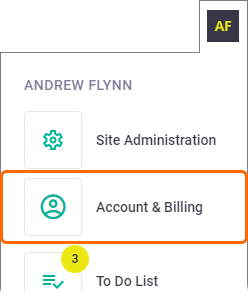
From the Main Menu in AroFlo Office:
|
 |
 |
Only authorized users can access the billing portal. If you can't see the option, see your manager or site administrator.
Manager or Site Administrator instructions
To manage which of your users can access Accounts & Billing:
- Click Account Settings
- Find User Access, then click Add User
- Click the names of your users to provide them access.
- Save Account Settings.
To access Accounts & Billing after being granted access, users may need to log out of AroFlo and back in again.
Multi-factor authentication
Users with access to the Billing Portal must be set up with Multi-factor authentication.
Using the Billing Portal
From the main screen, view your account info and your most recent three invoices. Use the tabs to edit your settings or check billing-related data.
Remember to Save if making any changes.

Dashboard

Your Account Explained
| Plan Information | Add-Ons | Usage and Invoices |
|---|---|---|
|
Contains information about your current AroFlo plan. Clicking View Plans will give you more information about alternative AroFlo plans if they are available. |
Displays information about your current account add-ons, such as document storage and the accounting integration you are currently using. You can also enable the AI Bill Scanner feature from here. |
|
Invoices

Invoices Explained
| Invoiced Date | Invoice No. | Description | Plan | Invoice Total | Balance Due | Actions |
|---|---|---|---|---|---|---|
| Invoice date | Invoice number | The invoice description | The plan that relates to the invoice | The invoice total | Balance Due | Pay your invoice manually through our secure portal. |
More on Invoice Actions
Invoice actions allow you to interact with them in a couple of different ways. The button in the Actions column will look different depending on the state of the invoice:
| Unpaid | Paid |
 |
 |
Clicking either button will take you to the online invoice viewer to pay your invoice, ask a question, or view attached documents.
|
Click the down arrow > View Usage Report to see a breakdown of your usage for the billing period related to that invoice. A usage report is available whether the invoice has been paid or not. |
 |
 |
Account Settings
Company Information

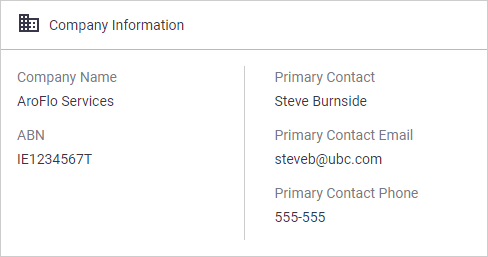
Displays your Company Name, ABN/VAT number, Primary Contact Name, Primary Contact Email, and Primary Contact Phone Number as per your business unit settings.
This information is read-only.
Accounts & Billing Contacts

User Access
Click Add User to add the names of users you would like to access Accounts & Billing.
Click the red X to revoke their access.
Billing Emails
Users with User Access will receive billing emails like invoices and payment reminders. The Primary contact's email address will also receive these emails (listed as the TO email address). If you need to add further email addresses to receive these emails, click Add Email. These will be listed as CC and can be removed by clicking the red X.
Edit the TO email address
If you need to edit the TO email address, please contact AroFlo support.
Billing Address

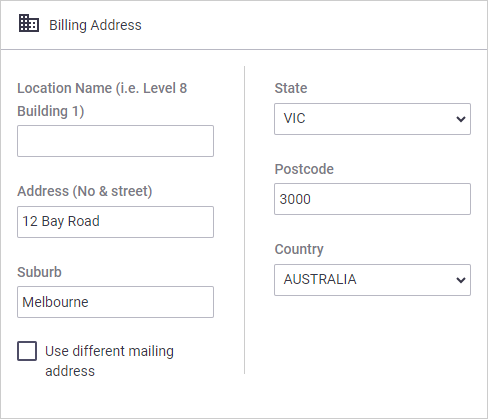
Enter your Company Billing Address, making sure to click Use a different mailing address and fill it out if that's the case.
Stored Credit Cards

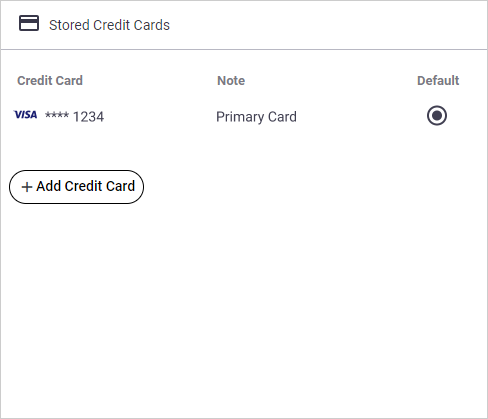
When empty, click + Add Credit Card to fill in your card details for direct debit.
| Credit Card | Note | Default |
| Credit card information | Custom note | Click the radio button to set this card as your default for direct debit |
| Actions | ||
| Click the red X to remove the card from your list of stored cards. | ||