|
A Task Checklist contains a series of items that can be added to tasks and which require a response (Yes, No, NA). They are visible in Office and in Field. A Task Checklist might be used to prompt a user to record key events within a task. For example:
Checklists can be added manually to any task after it has been created, or, for a series of steps common to your Task Types, your Site Administrator can set up automatic checklists. Interested in learning through an interactive course in the AroFlo Academy? |
 |
 |
Setting up a Task Checklist
Task Checklists are based on Checklist Templates, which can be created by your Site Administrator. See Checklist Templates for more information.
Your Site Administrator can also set up certain checklist items so that they start or stop the job timer automatically as you mark them off. See Record Labour on a Task for information on using this feature.
View Task Checklists
|
To view a checklist on a task in AroFlo Field, tap the Checklists tab or the Checklists tile on the Overview. If the task type has been set up to have a particular checklist, that checklist will display. If the task type does not have a checklist associated with it, you can add checklist items manually (see instructions below). |
 |
 |
Add Checklist Items
|
After a task has been created, additional checklist items can be added if required. This can be useful if a task has checklist items that aren't needed often enough to be shown permanently. |
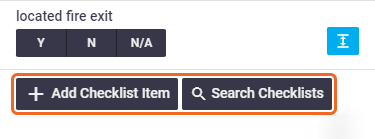 |
 |
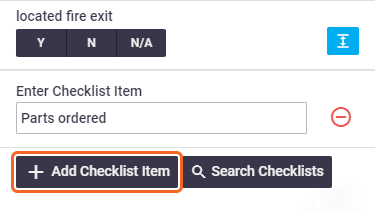
Ad hoc checklist item
|
To add a one-off checklist step:
|
 |
 |
Select existing checklists/items
|
Alternatively, you can select existing checklist items from another checklist template, or an entire checklist template:
|
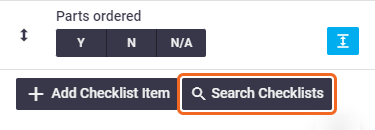 |
 |
Periodic Tasks
If working on a Periodic task, tapping Search Checklists will bring up a submenu:
| Option | Description |
|---|---|
| Task Type Checklists | Access the functionality described above |
| Periodic Checklists | Select the checklist/items within the Periodic Task Template Checklist. Add checklist items or the entire checklist using the instructions above. |
Reorder checklist items
Ad-Hoc Checklist Items as well as checklist items marked as sortable can be rearranged. Hold and drag the  (double-ended arrow) to reorder. (double-ended arrow) to reorder. |
 |
 |
Add Manual Checklists
Manual checklists are useful if you:
- have generic checklists that could be used for multiple Task Types
- have checklists that don't need to be added every time you select that Task Type
- are working on the task over multiple days or with multiple people. For example, you have filled out the first checklist and need to add the same checklist again the next day.
|
To add a manual checklist:
Can't see any options? If you don't have a Manual Checklists heading, this means that manual checklists have not been made available for this task. Your Site Administrator can enable manual checklists.
|
  |
  |
Complete Checklist Items
|
Checklist Items are completed by selecting a response, which can be either PASS (Y), FAIL (N), or NOT APPLICABLE (N/A). Any checklist item that has a coloured background must be marked with a response before the task status can be set to 'Completed'. Once you tap Save, the background colour is removed from any completed items. When the user selects a response and taps Save, AroFlo records the following details:
Timesheet shortcut Tap the |
 |
 |
Escalate a Fault
|
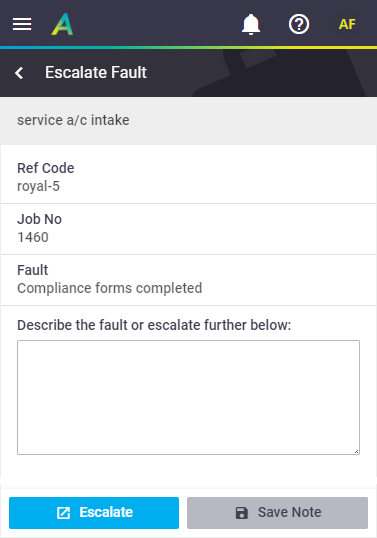
If a checklist item is marked as FAIL (N), you may see two additional options (if set up in Checklist Templates): Escalate FaultTap Escalate to create a new task for the client and location (if selected), that uses the checklist item's description as the Task Name. Leave a NoteType a text note into the text field and tap Save Note. The note will display beside the checklist item. |
 |
 |
Access checklist options
|
Each checklist item contains additional options. To access these, tap the Information counterIf information is contained within a checklist item, the expand icon will have a counter on it to indicate this. In this example, a note has been added to a checklist item. 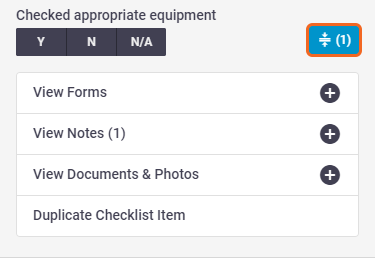 |
 |
 |
Forms
Each Checklist Item lets you link existing forms such as OHS Checklists, Risk Templates, and Custom Forms.
- Tap View Forms to access existing forms created for that checklist item.
- Tap
 (plus button) to create a new form based on an existing template.
Within Forms you can choose a form from:
| Option | Description |
|---|---|
Spec Forms |
Forms that are specific to the chosen Task Type. |
All Forms |
Lists all forms available in AroFlo (i.e. not specific to a Task Type). |
Task Forms |
Forms that have been created against this Task Checklist Item. This is the same as selecting View Forms. |
See Compliance Forms for more info.
Notes
Add and View Checklist Notes
|
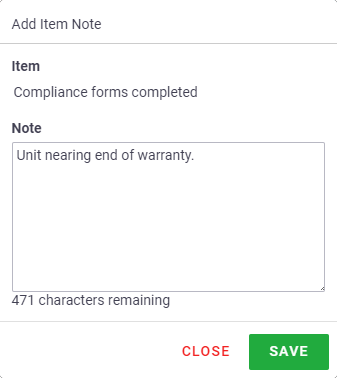
Each checklist item allows you to add and view notes. You might use a checklist note to record details on why an item was marked a certain way (e.g. Failed) or general notes about the checklist item when it was completed. Tap Permission groups Anyone using default permission groups can view and add checklist notes. Supervisors will also be able to edit, and Managers will be able to edit and remove. Custom permission groupsFor custom permission groups, Site Administrators can enable checklist notes by going into Permission Groups > [Select permission group] > Checklists > Fields > Notes > View (set to ticked). This will enable Add and Edit as well. |
 |
 |
Edit or delete a note
|
From the View Notes view, tap the This view will also show further information, e.g. who created the note, if the note was edited, and by whom. Alternatively, tap Delete if you need to delete the note. You can also add a new note from the View Notes view by tapping |
 |
 |
Documents and Photos
|
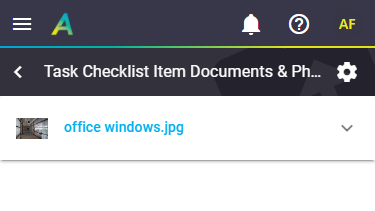
Each checklist item allows you to add and view documents and photos. Adding documents and photos to checklist items can be useful. For example, if you need to fail a checklist item, you can attach a photo to show why. You can either upload a document or photo or take a photo from your device and attach it directly to the checklist item. Tap Permission groups Anyone using default permission groups can view and add checklist documents and photos. Supervisors will also be able to edit, and Managers will be able to edit and delete. Custom permission groupsFor custom permission groups, Site Administrators can enable checklist documents and photos by going into Permission Groups > [Select permission group] > Checklists > Fields > Documents and Photos > View (set to ticked). This will enable Add and Edit as well. Tick Remove if you want users to be able to delete documents and photos from checklist items. |
 |
 |
Additional options
|
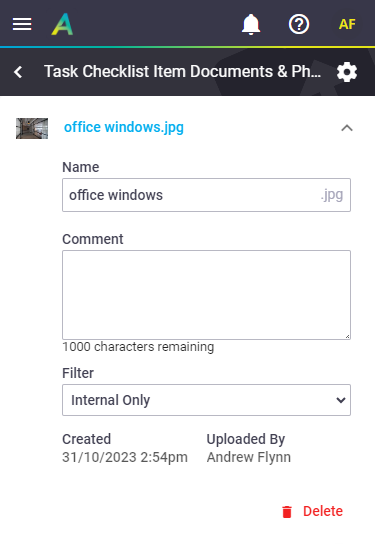
When viewing documents and photos, tap the:
|
 |
 |
Duplicate Checklist Item
A checklist item can be duplicated by selecting Duplicate Checklist Item.
This is the fastest way to duplicate a checklist item where multiple people are working on a step. Each technician can simply duplicate a checklist item and tick it off for themselves. Duplicating also retains any settings on the original item (such as email or SMS on Pass / Fail / N/A).
It is also useful in scenarios where someone marks a checklist item as failed and leaves a note. A new user can review the note, duplicate the item, and update the checklist with an ongoing record.
Watch a helpful video on duplicating checklist items
Service Actions
If a Service Action Group has been linked to the Checklist Template, an option will appear so a Service Action can be selected for each Checklist Item.
This feature can be especially useful where items are changed on a very frequent basis. This could be during maintenance swapouts where it may not be worthwhile to maintain the changes in an Asset Register.
The Checklist Item could be for parts being changed frequently, and the linked Service Actions might be to add an Inventory Item against the task, or add a Form or Document each time a Checklist Item is marked.
1. Access checklist options
Tap  (expanding arrows icon) to access the checklist options, as mentioned above. (expanding arrows icon) to access the checklist options, as mentioned above. |
 |
 |
2. Select Service Action
| Tap the Service Action dropdown menu and select the appropriate action from the list. |  |
 |
3. Save
|
Once selected, be sure to Save to lock in your change. You can set the Service Action against multiple checklist items before needing to tap Save. You don't need to save after changing each individual item. |
 |
 |
4. Results
| This particular Service Action had an inventory item and a document attached to it. You can see that these items were automatically added to the task by a service action because they include the tag icon. |  |
 |
 (filter) at the top to narrow down the checklists being displayed (All, Task, Quote, or Quote and Task)
 beside the relevant checklist to display the individual items. Tap each item you want to add and tap Select.
 (arrow right) to access the checklist items.
 (GPS pin) to view the location on a map.
 (box with arrow) to easily create a timesheet entry. The start time will be prefilled with the time the checklist entry was marked as completed.
 (plus button) to add a note or View Notes to view existing ones.
 (pencil icon) to edit a note, then tap Save.
 (green plus button).
 (plus button) to add a document or photo or View Documents & Photos to view existing ones.