What is an object?
In AroPoint, any asset with a tracking device (vehicle or equipment) is known as an object, e.g. a delivery van (vehicle tracking) or skip bin (equipment tracking).
See Setting up GPS tracking for more information on tracking device types.
Adding an object
When purchasing a GPS device, AroFlo will add your Objects for you and enter the following information:
- Name of object (same as Device IMEI)
- Relevant device sensors (see Optional settings, below)
- Any additional information provided (e.g. Device model and SIM number) in the Advanced tab.
Simply edit the object's name as well as any other information you wish to change, and link your objects to assets. For instructions, please see Getting Started - Adding an object.
Editing an object
|
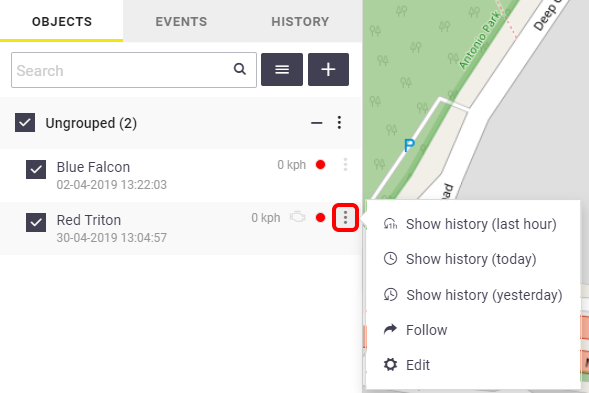
Click the three dots ( Make the necessary changes and Save. |
 |
 |
Deleting an object
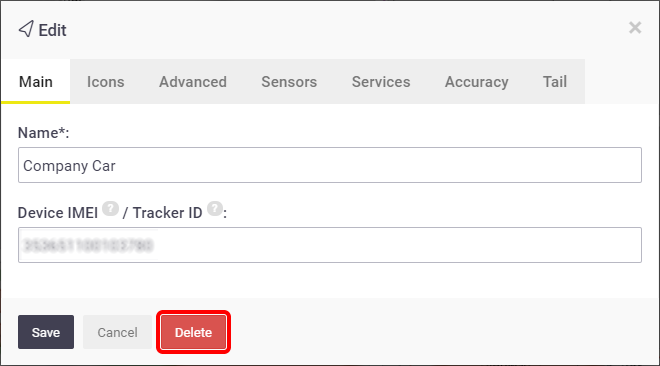
Loss of data Any data collected on this GPS device will be lost and cannot be retrieved if you delete the object. Billing You will still be billed the relevant rate for this device for the current month, however, the price change will take effect the following month. E.g. if you're being charged for 3 objects and you delete 1 in December, you will still be charged for 3 objects for your December invoice, but 2 for January. |
 |
 |
Object shortcuts
|
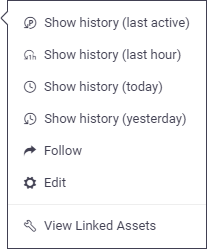
Click the three dots (
|
 |
||||||||||||
 |
Object groups
|
You can group your objects depending on your workflow, for example, if you have different business units, work zones or service areas, or work types. Another method of grouping could be depending on the type of tracking device, e.g. vehicles, equipment, or mobile devices. If you have multiple GPS devices, creating object groups can be useful as you can show/hide the selected object groups on the map to make it easier to see who is where. Other use cases
|
 |
 |
Create object groups
The fastest way to add an object group is by clicking on three dots  next to the Ungrouped group. In the Add group window, type a name for the new group and select the objects you want to include in the group.
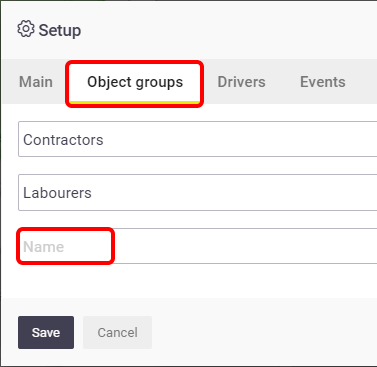
Alternatively, if you want to set up multiple groups, follow the below instructions:
- Click
 (Setup) > Object groups.
 - Type each group name in the 'Name' fields.
- Save.
Click the x to delete an object group.
Assign objects to a group
|
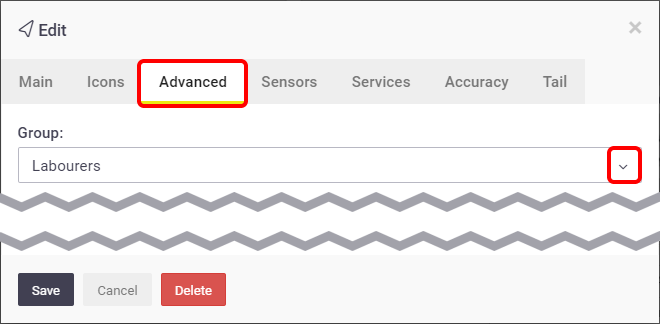
Next, edit your objects to assign them to a group. Click the three dots Remember to Save. |
 |
 |
|
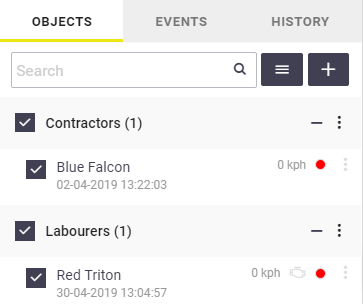
Your object groups will look like the screenshot to the right. Ticking/unticking the tick boxes ( If you don't create object groups, a default group of 'Ungrouped' will display. |
 |
 |
Editing object groups
|
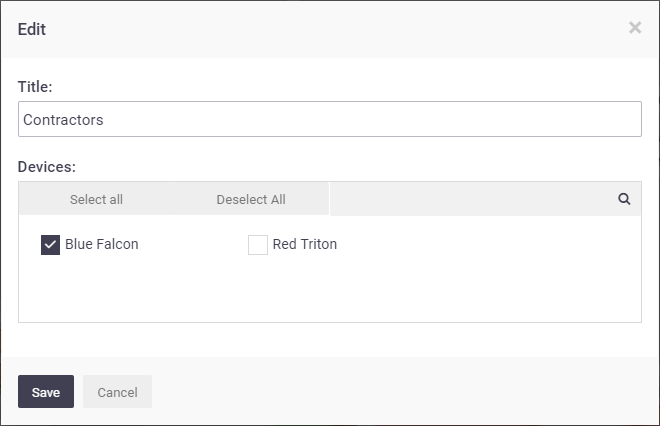
Click the three dots ( From here you can rename the object group and you can assign objects to a group from here also. Select/deselect the objects to be assigned to this group, or use the 'Select all' or 'Deselect all' option. Save your changes. |
 |
 |
 ) beside the object name and click Edit.
 beside the object name and click Edit > Advanced > and select a group for this object from the dropdown.
 ) will show/hide the selected object groups on the map.