AroConnect is a professional networking service for contractors within AroFlo for sending and receiving work.
Join a community of AroFlo users to send work orders to your subcontractors, receive work orders from head contractors and more.

By default, every AroFlo subscription is already connected using the AroConnect network. To check this, or modify your settings:
- Navigate to Site Administration > Settings > AroConnect.
- Click
 (cog).
 - AroFlo will display your business unit information to confirm it is correct.
- Change anything that's not quite right like your business name, email address or phone number and then click Save & Close.
What if I need to update my AroConnect Contact?
Make sure the user you'd like to set as your AroConnect Contact is also listed as an Accounts & Billing Contact in the Billing Portal. Otherwise, they won't appear in the selection list.
What if I don't want to be listed in the directory?
If you'd rather use AroConnect privately and not be listed in the public connection directory, untick  in the AroConnect settings menu. You can tick this again at any time.
If you do wish to keep your business private, you will need to provide your AroConnect Code (available through the settings menu) to your potential connections in order to connect with them.

What would you like to learn about?
I'm the Client. How do I add Contractor connections?
AroConnect makes it easy to connect with your favorite subcontractors either through email or site administration.
Email an Invitation to Connect
- Navigate to Accounts > Contractors.
- Either search for an existing Contractor or add a new one.
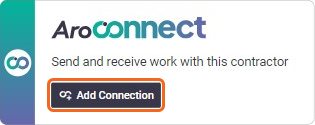
- Click Add Connection in the AroConnect box next to the contractor's logo.

- The Connect Existing Contractors dialog appears. It will show the information as it exists on the Contractor card, then click Send Request.
- An email will be sent to the address visible in the dialogue.
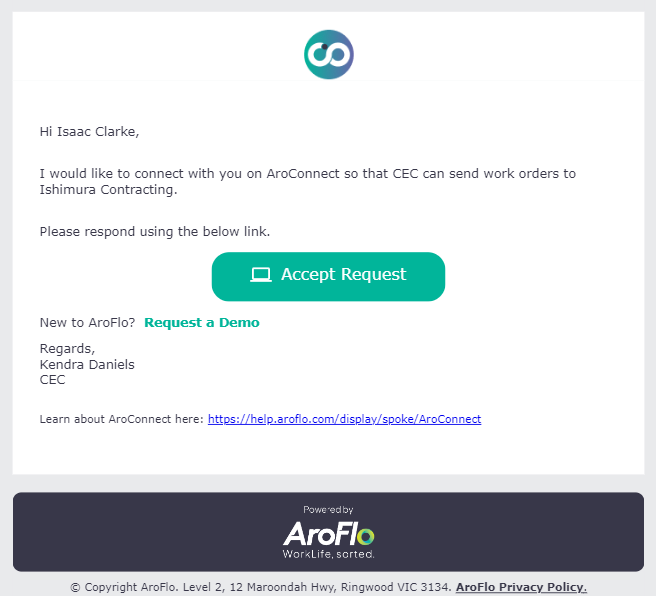
What will the subcontractor see?
The subcontractor will receive an email. They just need to click Accept Request and follow the on-screen prompts to finish the process.
Show me

How do I resend a connection request to my contractor?
If you haven't heard back from a contractor you've sent a request to, or you want to remind one of your connection request:
- Navigate to Accounts > Contractors.
- Search for the contractor you originally sent the request to and click their name.
- Click Resend in the AroConnect box next to the Request Sent confirmation.

The contractor will receive another connection request.
Browse and Connect Through Site Administration
After registering with AroConnect you will be taken to the Add Connections screen:
- Navigate to Site Administration > Settings > AroConnect.
- Click
 .
.
- Enter a company name or AroConnect Code and click the relevant Search to check if they are also registered with AroConnect and connect with them.
- Tick their name, then click Next.

- After selecting your connection, in the AroFlo Contractor search box, type the name of the contractor as it is known in your AroFlo and click them in the list that appears; alternatively, click + Create New Contractor next to the search box to add a new Contractor.

Create New Contractor
When you click Create New Contractor, AroFlo will create a new Contractor for you to re-use including their public information and also link them. - Click Send Request and AroFlo will send them an invitation to connect with your AroFlo through AroConnect.
- Click Done to finish this process.
An email notifying the business you're asking to connect with will be automatically sent giving them instructions on how to accept your request.
You can also add connections later using:
- The
 button in the AroConnect Connections screen, or
 - The top right of the Suppliers list in Accounts > Contractors (
 ).
).
I'm the Contractor and I'd like to receive work orders. How do I manage my connections?
The AroFlo AroConnect Connections screen is designed to help you manage your connection settings and see the status of your invitations using status updates.

- Click
 to browse the directory and make connections with contractors.
 - Click
 to access your AroConnect Settings, which you used to set up your connection including the public/private toggle, or retrieve your AroConnect Code at a later date.
 - Click
 to filter the list of connections to only see requests or all of your connections.
 - Click ⋮ to either disable/reactivate a contractor connection or click Settings to change the attached contractor.
How do I set the business unit that receives my work orders?
The Settings menu also allows you to set where your client's work orders go in your business unit structure. To do this:
- Click the dropdown next to Default Business Unit
- Choose a business unit from the dropdown
- Click Save and Close - Business Name, Role Type and AroFlo Client / Contractor will let you know the AroConnect connection you've made with each of your Clients (from whom you receive work orders) and Contractors (whom you are sending work orders) and whether you normally send or receive work orders to each other.
- Status shows you messages depending on your recent activity with that business:
 |
Indicates that you have an active connection with that business. |
You can also use the Contractor List to view the status of your connections with contractors managed through AroConnect.
|
|||
 |
Indicates that you have sent a request to that business. |
- Request Actions allow you to quickly and easily follow up on connection requests through the AroConnect network. See the next section for more information on using actions.
An email will be automatically sent to your primary contact when your connection has accepted a request.
What comes next?
If you're the Contractor, wait for work orders to come in. If you're the Client, you can start creating AroConnected work orders!
How do I use actions to manage my connections?
Actions:
To communicate or respond to your connections, you can use the Actions column:
Accept
Accept a connection request you have received to link with that business through AroConnect.
If you want to accept a Work Order specifically rather than a connection request, you can do this from Workflow > Work Orders > Incoming.
- Click Accept Request.
- Link the requesting business to an existing AroFlo client/contractor of yours as before (or create a new one).
- Click Accept Request.
- Click Done.


