|
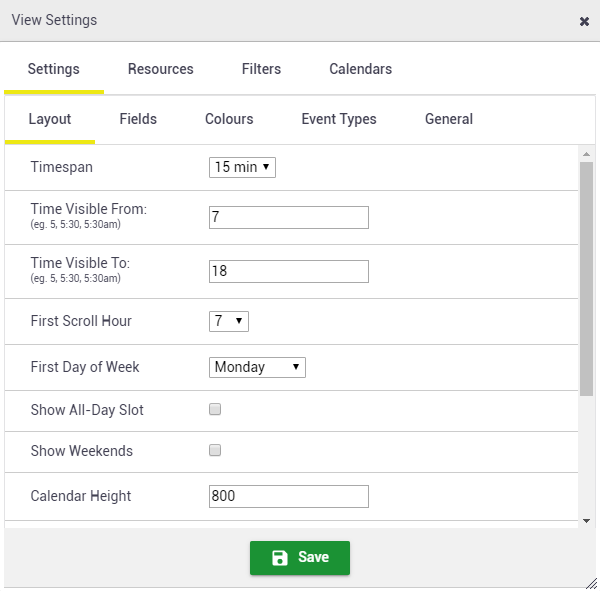
Layout settings control the visual layout of your calendar and allow you to customize a range of calendar elements, such as the times displayed, whether or not weekends are shown, the default view type and much more. Using the standard calendar view? You'll need to create your own calendar view before you're able to customize it. See Calendar Views - Overview. To access the layout settings for your calendar, click the |
 |
 |
Timespan
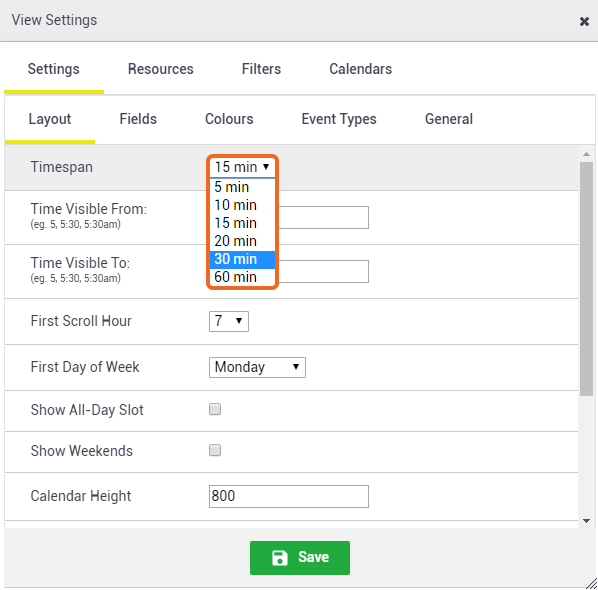
The Timespan setting allows you to set the time intervals displayed on your calendar (5, 10, 15, 20, 30 or 60 minutes). Common Intervals Most clients use either a 15 or 30-minute interval.
|
 |
Time visible from and time visible to
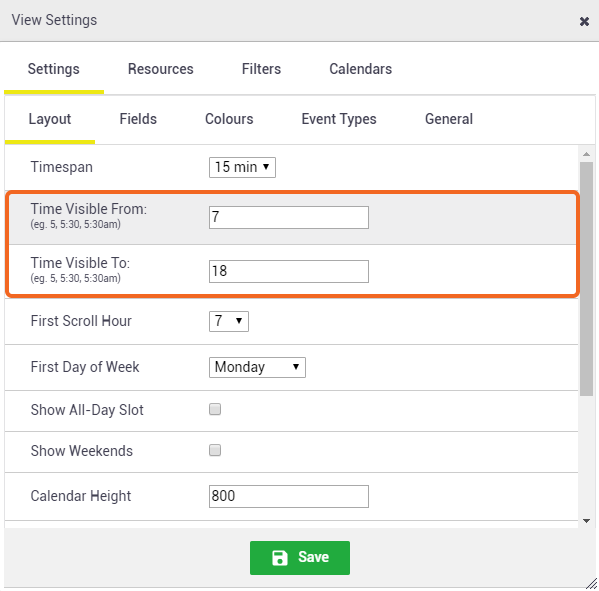
The Time Visible From and Time Visible To settings allow you to choose the start and finish times of your calendar view.
Times can also be entered in 24-hour time, e.g 0600. |
 |
First scroll hour
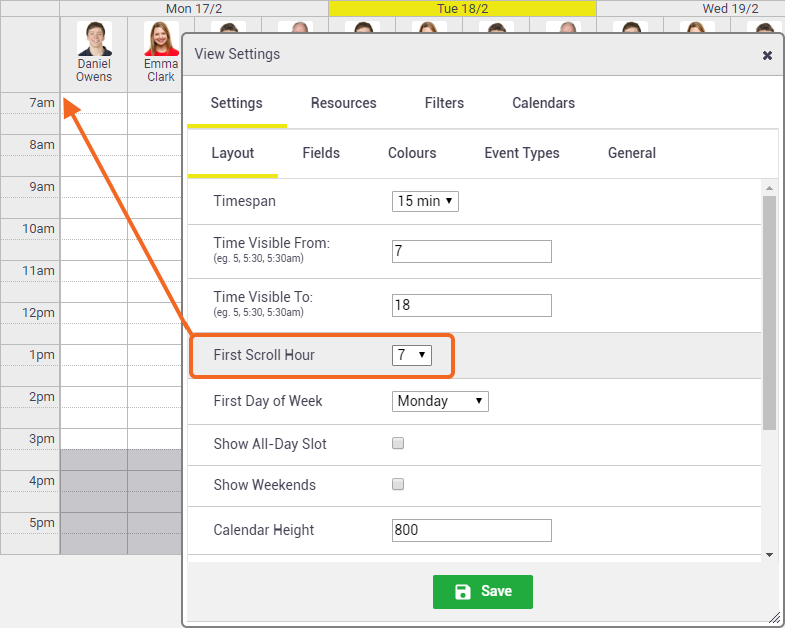
The First Scroll Hour setting allows you to choose the time your calendar will automatically scroll to when you first open and view the calendar.
|
 |
First day of the week
The First Day of the Week setting allows you to choose the day your calendar will start from. You can choose any day of the week or opt for your calendar to always start at 'today' or 'yesterday'.
- Select your preferred start day from the First Day of Week dropdown list.
- Click Save.
Show All-Day Slot
|
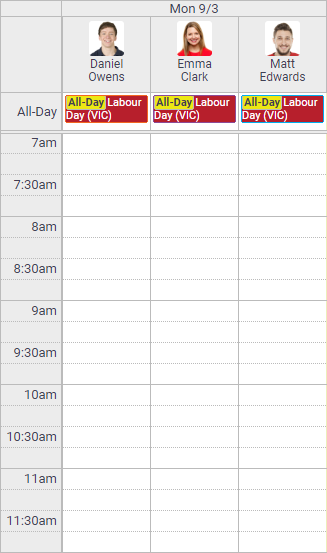
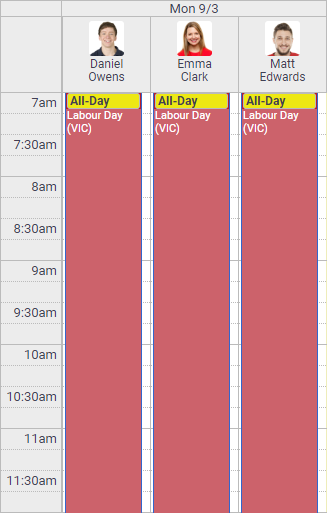
If you've added special calendars such as Public Holidays or Industry RDOs, the All-Day slot is helpful and frees up your calendar, as these events will be shown as a header to your calendar, as opposed to taking up the full height of the column. The All-Day slot is only applicable to time-based views. |
|
Show weekends
The Show Weekends checkbox allows you to include or exclude weekends in your calendar view.
- Click the Show Weekends checkbox to include weekends in your calendar view.
- Click Save.
Calendar height
The Calendar Height setting allows you to adjust the height of the calendar according to your monitor size. You may need to try a few sizes to get the best fit for your screen.
- Type your preferred height into the Calendar Height field.
- Click Save.
- Readjust the height as required by repeating steps 1 and 2.
Content height
The Content Height setting allows you to adjust the height from the resource names in the calendar to the bottom of the calendar.
- Type your preferred height into the Content Height field.
- Click Save.
- Readjust as required by repeating steps 1 and 2.
If you leave the default content height set to zero, AroFlo will apply a default content height.
Minimum resource width
The Minimum Resource Width setting allows you to adjust the width of the resource columns in your calendar.
- Type your preferred width into the Minimum Resource Width field.
- Click Save.
- Readjust as required by repeating steps 1 and 2.
Resource view column width
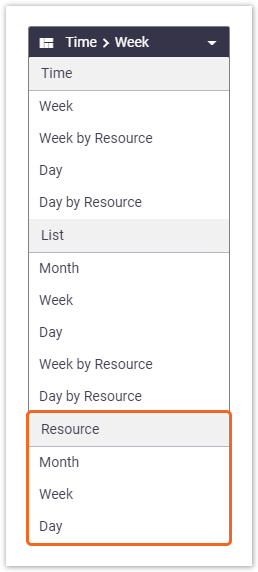
The Resource View Column Width option controls the width of the columns that appear when you are using any of the views under the Resource view type.
Show me
- Type your preferred width into the Resource View Column Width field.
- Click Save.
- Readjust as required by repeating steps 1 and 2.
Default view type
The Default View Type setting allows you to select a standard calendar view that will be displayed each time you open the calendar.
- Select your preferred calendar view from the Default View Type dropdown list.
- Click Save.
 (three dots) icon in the top left of the calendar.