|
If your business offers different tiers of pricing when selling materials, you can set up pricing levels that allow you to select various price points for inventory items when quoting or invoicing a job. Examples of pricing levels may include:
|
 |
 |
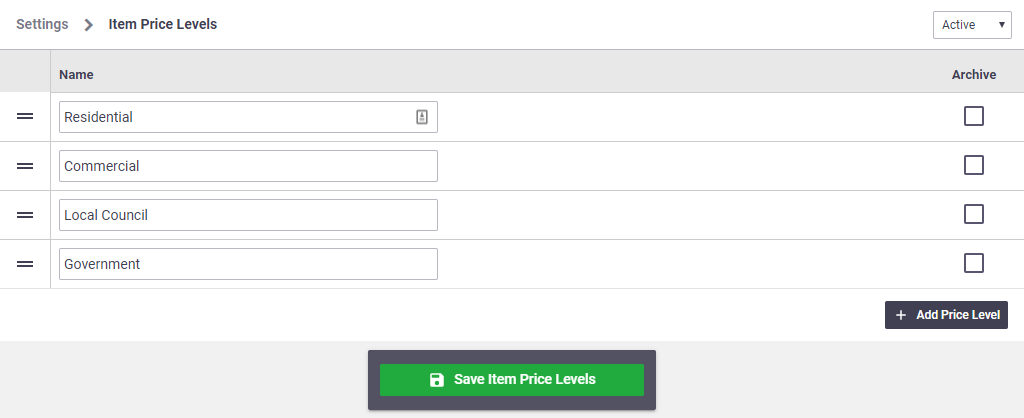
Set up price levels
|
To set up the types of price levels that your business unit offers:
|
 |
 |
Enter pricing on inventory items
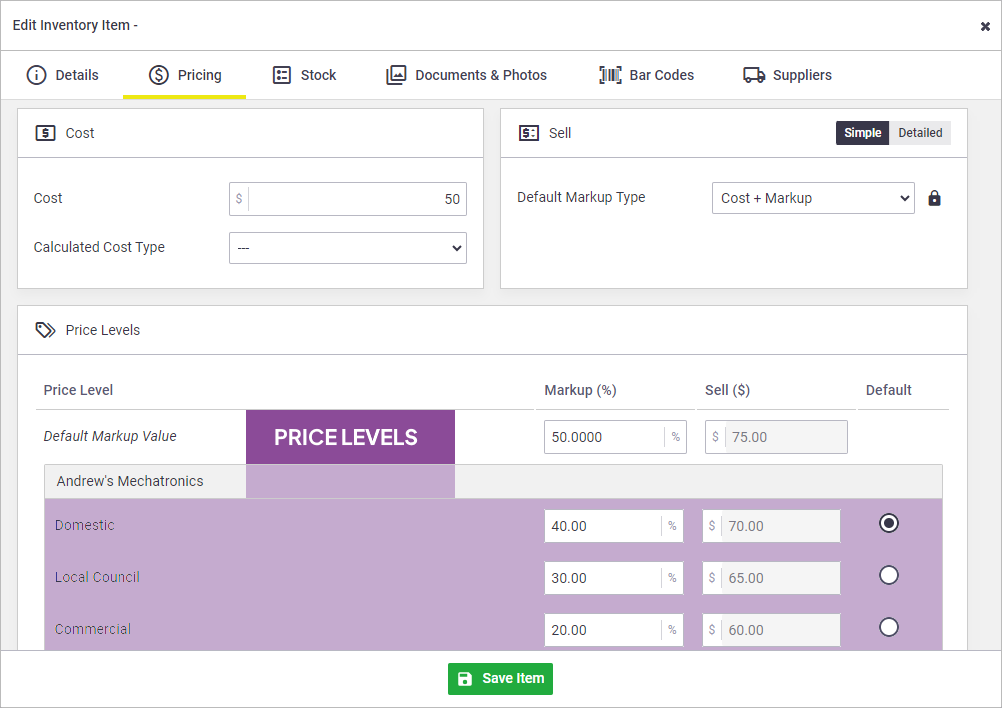
To set price levels, enter a markup (%) or sell ($) value on your inventory items.
- Go to Manage > Inventory.
- Search for an item, or add a new item.
- In the Inventory card, click the Pricing tab.
Importing Price Levels
Price levels can also be imported. See Bulk Import: Update Inventory for more information.
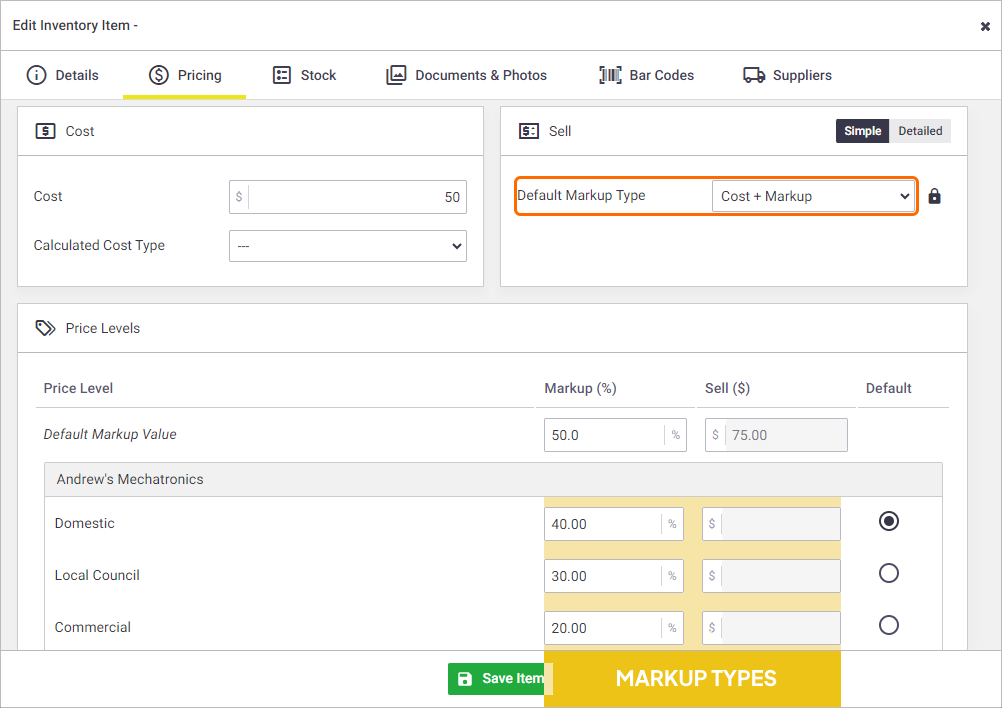
A. Choose a markup type
|
Choose how you want to enter your price levels using the Default Markup Type dropdown. This choice defines which markup type column will be made available to enter values. Setting a Default on an inventory item will override a Default set against the business unit. |
 |
 |
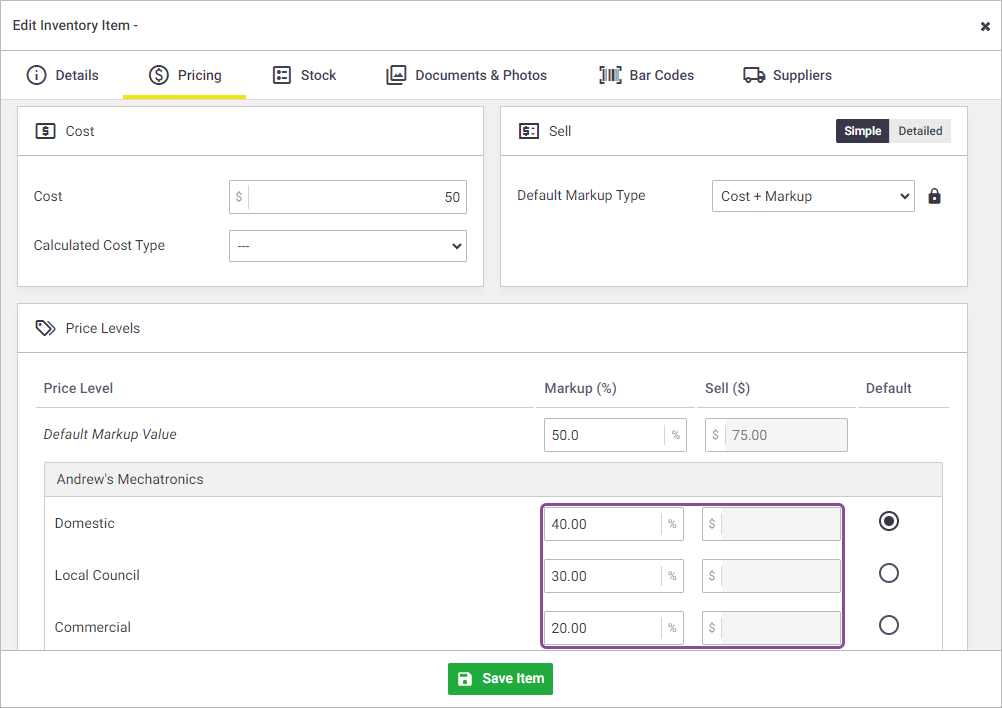
B. Enter markup values
Advanced pricing You can also enter independent values for Markup % and Sell by clicking the padlock next to the Markup Type selection. This turns off the Lock pricing to Default Markup Type feature. This may be useful when you wish to charge one client the listed markup percentages (%), and another the listed sell ($) values. |
 |
 |
C. Choose a default price level
|
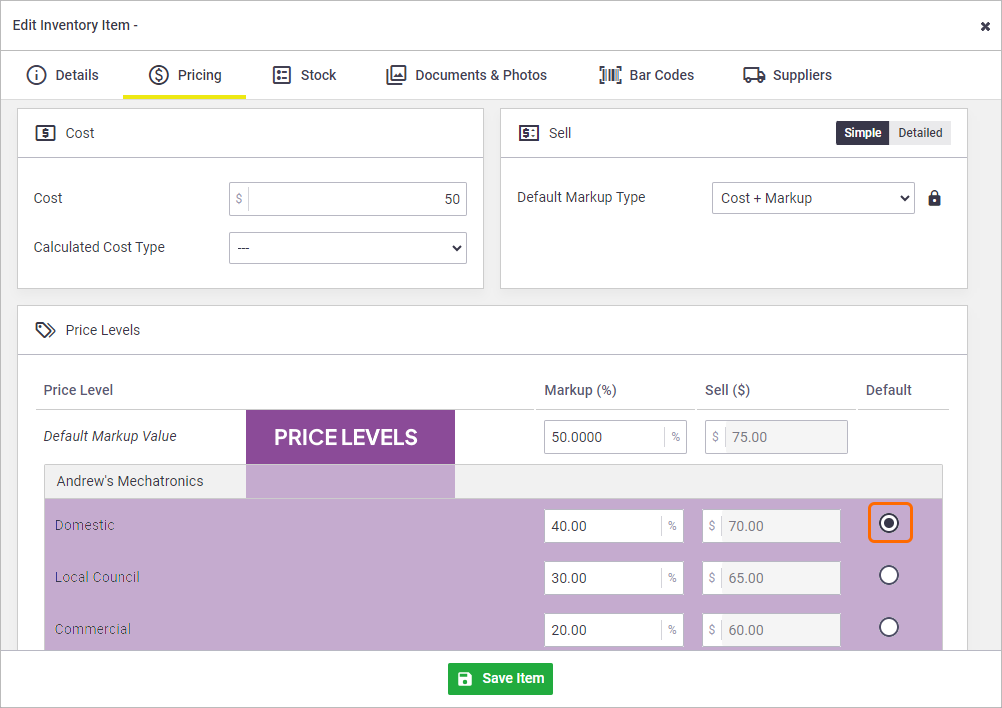
You can choose a price level to be used initially when this item is added to a Quote, Task or Invoice. For example, you may want to charge the 'Domestic' price level when this item is first added to a quote, task or invoice. A different price level, such as 'Commercial', can always be selected once the item is on the quote, task or invoice. To set a Default Price Level, tick Default in the relevant price level row. You can also set specific clients to use certain price levels. See the section below to learn more. Setting a Default on an inventory item will override a Default set against the business unit. If you want to use the Default Price Level set for the business unit, don't tick a Default Price Level on the inventory item. |
 |
 |
Selling inventory with price levels
|
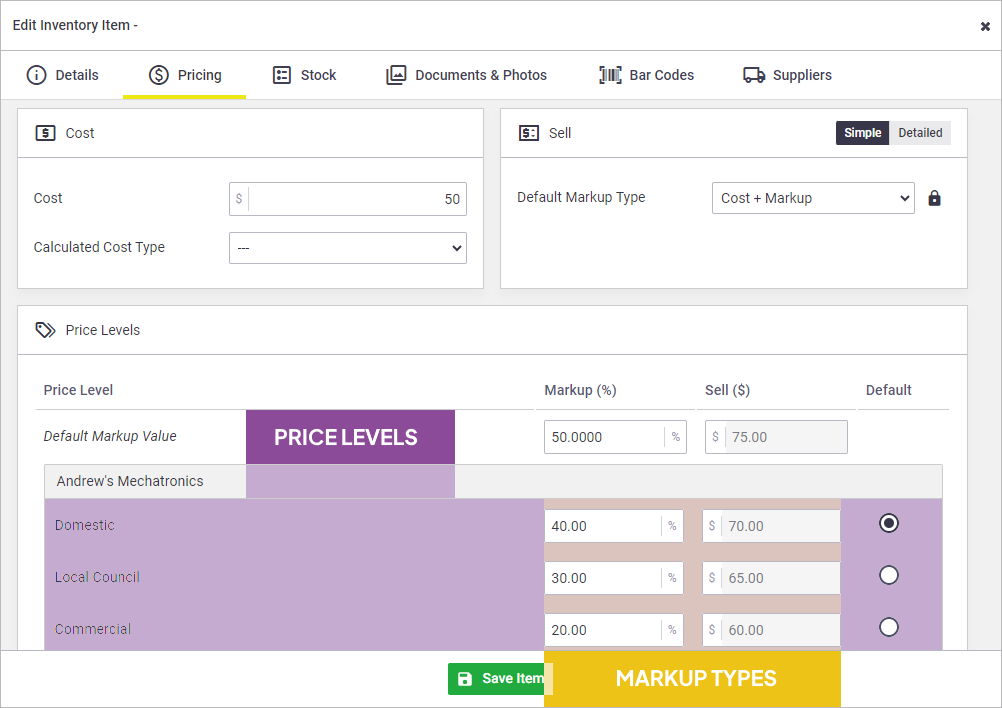
When AroFlo determines how much to charge for a material item, it uses a Markup Type with a Price Level.
When the item is added to a quote, task or invoice, AroFlo picks a column and a row. When no default markups are set against the client:
In the image shown, when a tin of paint is added to a quote, task or invoice, the:
So the price that will appear on the quote, task or invoice will be the original cost of $50 plus a markup of 40% ($20), giving $70.00. |
 |
 |
| When adding inventory items with price levels to a quote, task, or invoice, you can hover over the Sell value to see how the price was calculated. | 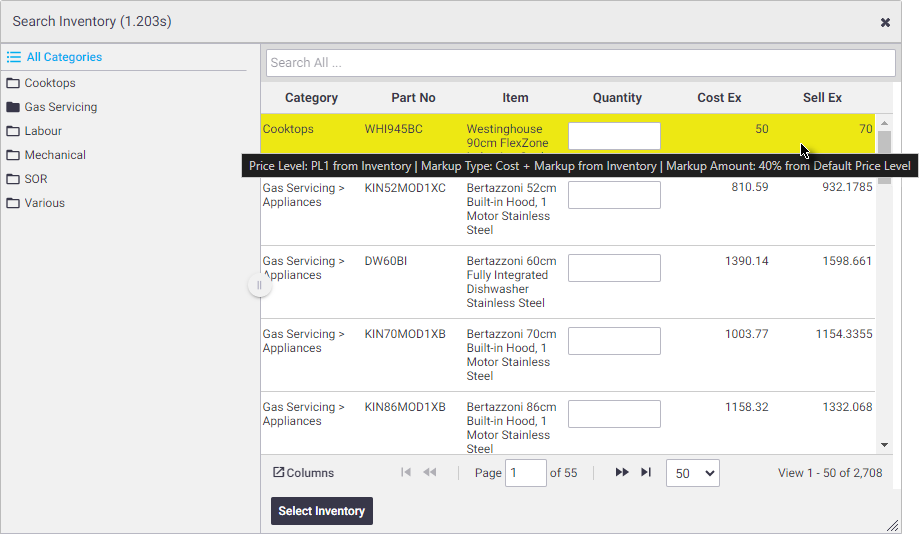 |
 |
|
Once you've added inventory items to a quote, you can choose a different price level by clicking This is also available when adding inventory items to an invoice, but the icon will be a |
 |
 |
Advanced price level setup
AroFlo lets you configure markups that apply to a specific client, individual inventory items, or across all materials within a business unit.
For example, you can:
- set a default pricing level for specific clients, e.g. always set the 'Government' pricing level when selling to the local council.
- set a default pricing level against the Company / Business Unit, so you don't have to set a default on every inventory item.
To learn more about advanced options, see Default Markups and Price Levels.
 (tag icon) for the item's markup or sell value and then selecting the relevant price level markup/sell value you need.
 (paper stack icon).