AroFlo's integrated inventory system is designed to keep track of stock held by multiple resources or in multiple storage locations.
To access your inventory, go to Manage > Inventory.
Interested in learning through an interactive course in the AroFlo Academy?
Add a category
Categories are used to organize your inventory and make it easier for users to find the items they need. You can create as many categories as required, including sub-categories. See Manage Categories for more information.
To add a new category:
- On the Inventory tab, click
 (Add New Inventory Category).
 - Enter the category name.
- Click
 (Save).
Navigation Tips
View subcategories
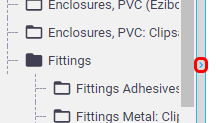
| If you have multiple sub-category levels and/or categories with long names, click the small arrow on the category slider to expand the view, |  |
 |
Resize the view
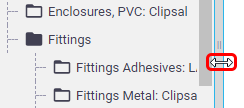
| or drag the bar across with the mouse. |  |
 |
Mix up your categories
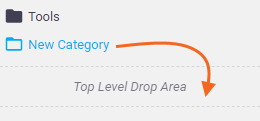
| New categories will initially appear at the bottom of the categories list. To have them slot in alphabetically, refresh your browser, or drag the new entry to the Top Level Drop Area. |  |
 |
Add items
New items can be added to a category at any time. When you create a new category, you will have the option to add inventory items individually or bulk upload inventory items from a spreadsheet. Existing categories only allow items to be added individually, however, you can easily move uploaded items from one category to another.
- Click Add Inventory Item in the middle of the screen. (
 )
) Bulk upload inventory items
The Bulk Upload Inventory Items feature allows you to copy and paste up to 300 items from a spreadsheet (.CSV format) directly into AroFlo.Alternatively, the Bulk Data Import tool gives you even more functionality and can import inventory items across multiple categories and even allows you to make updates to your inventory e.g. pricing.
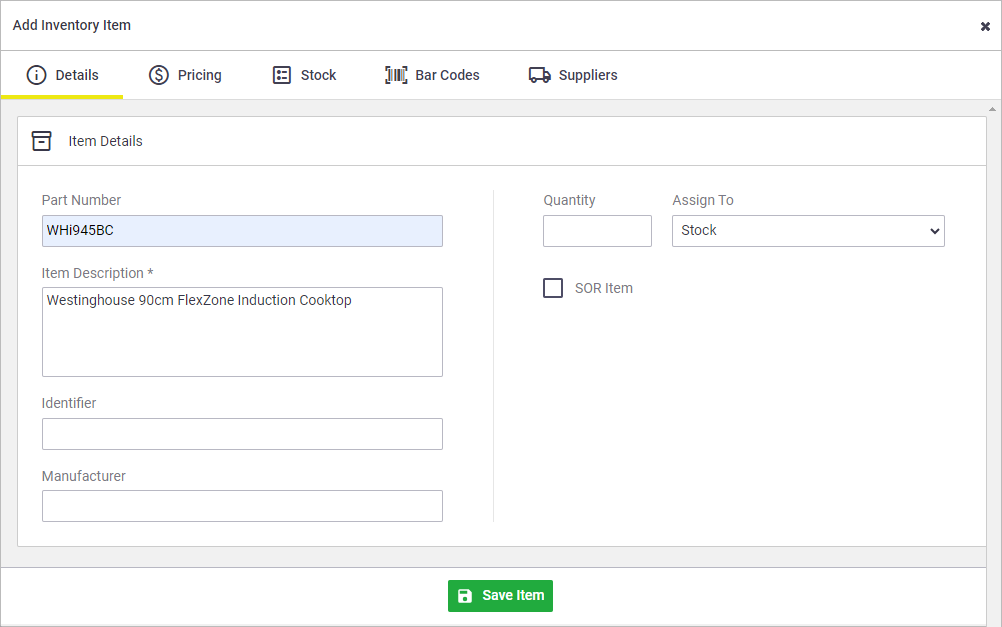
- Complete the fields as described in the table below.

Field/Section |
Description |
|---|---|
| Part No. | Assign your own or a preferred supplier's part number. (Searchable) |
| Item Description* | This is the primary identifier of the item. (*Required field) (Searchable) Maximum of 1000 characters. |
| Identifier | Used to record a secondary identifier such as a warehouse or storage location number. |
| Manufacturer | Used to record the manufacturer / producer. |
| Quantity | Enter current quantity of stock on hand. |
| Assign To |
Assign current stock to a user or custom holder. Users who have been set to not show as a storage location will not appear in the dropdown. |
| SOR Item Checkbox | Used to flag the item as an SOR item for flat rate items/fixed price quotes. |
Used for setting unique account codes (for accounting integration purposes), tax codes and tracking centers that are allocated when the item is added to a quote, task, purchase order, or invoice. See Allocations for more information. |
- Once fields above are completed, click the Pricing tab and enter the unit cost (ex. GST).
For more information about cost pricing and instructions on how to set the item's sell price, see Inventory item pricing.
- Save Item.
Optional tabs
Bar Codes
Record one or more barcodes against your inventory items so:
- you can quickly search for inventory items using a barcode number or scanner (in AroFlo Office)
- you can scan an inventory item and add it to a task, quote, and more (using a mobile device in AroFlo Field).
For information on creating your own barcodes, see Generate Scannable Barcodes.
Editing items
Once you've saved an item for the first time, you can click the item from the inventory list to edit it.
Make your changes as above and remember to Save Item.
You'll also have some additional/differing options:
| Option | Description |
|---|---|
| Documents & Photos tab |
Add documents and photos to your inventory item (e.g. product photos, specification sheets, and install guides). Adding photos to your inventory items is useful as the default image is used as the item's thumbnail which appears in several areas throughout AroFlo, e.g. in the inventory list and when adding items to tasks and quotes. |
| Category | Change the category this item appears in. See Manage Inventory Categories for more information. |
| Quantity | This field only appears when creating an inventory item. Once the item is created, the quantity is controlled within the Inventory list using the Allocate option. See Item List and Stock Activity. |
| Assign To | This field only appears when creating an inventory item. Once the item is created, assigning is controlled within the Inventory list using the Allocate option. See Item List and Stock Activity. |