In any big project, you're going to have questions as you go along, and you want to be able to record those questions and their answers in the place that makes the most sense - within the AroFlo project itself.
Below, we'll explain a method you can use to manage RFIs within AroFlo. You may find additional ways that work for you.
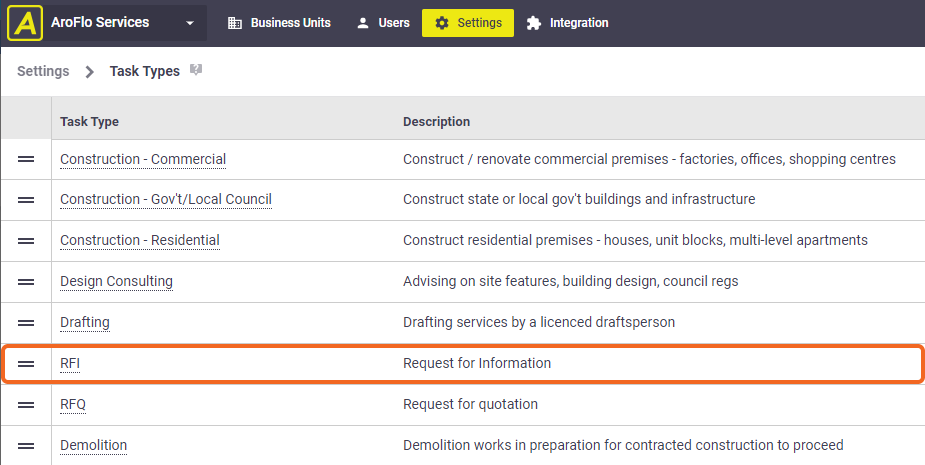
Set up a dedicated task type
- Create a Task Type called Request for Information or just RFI.
- Create a Task Custom Field called RFI Ref / No. This allows you to give each RFI a unique reference within the project. Be sure to link this custom field to the RFI task type you've just created.
- Set up a Checklist Template to take users through the RFI process and make sure nothing gets missed. Some checklist items you could use include:
- Draft RFI using template
- Add attachments as required
- Email RFI to respondent
- Follow up if no response by due date
- Add response to PDF.
- Link the checklist to the RFI task type
Show me how
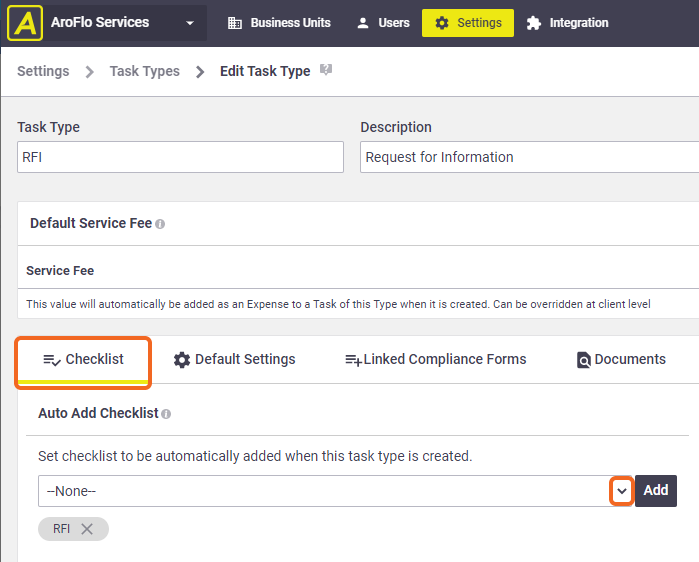
In Site Admin > Settings > Task Types, click the RFI task type you just created to open the Edit Task Type screen. On the Checklist tab, click the down arrow in the Auto Add Checklist section. Select the RFI checklist template and click Add. Click Save Task Type.
- Download our pre-built Request for Information (RFI) form and link it to the task type.
Our pre-built RFI form gives you a professional-looking document to send to your stakeholder. You can alter it if you like, or create your own RFI form from scratch.
View form in AroFlo vs as a PDF
AroFlo
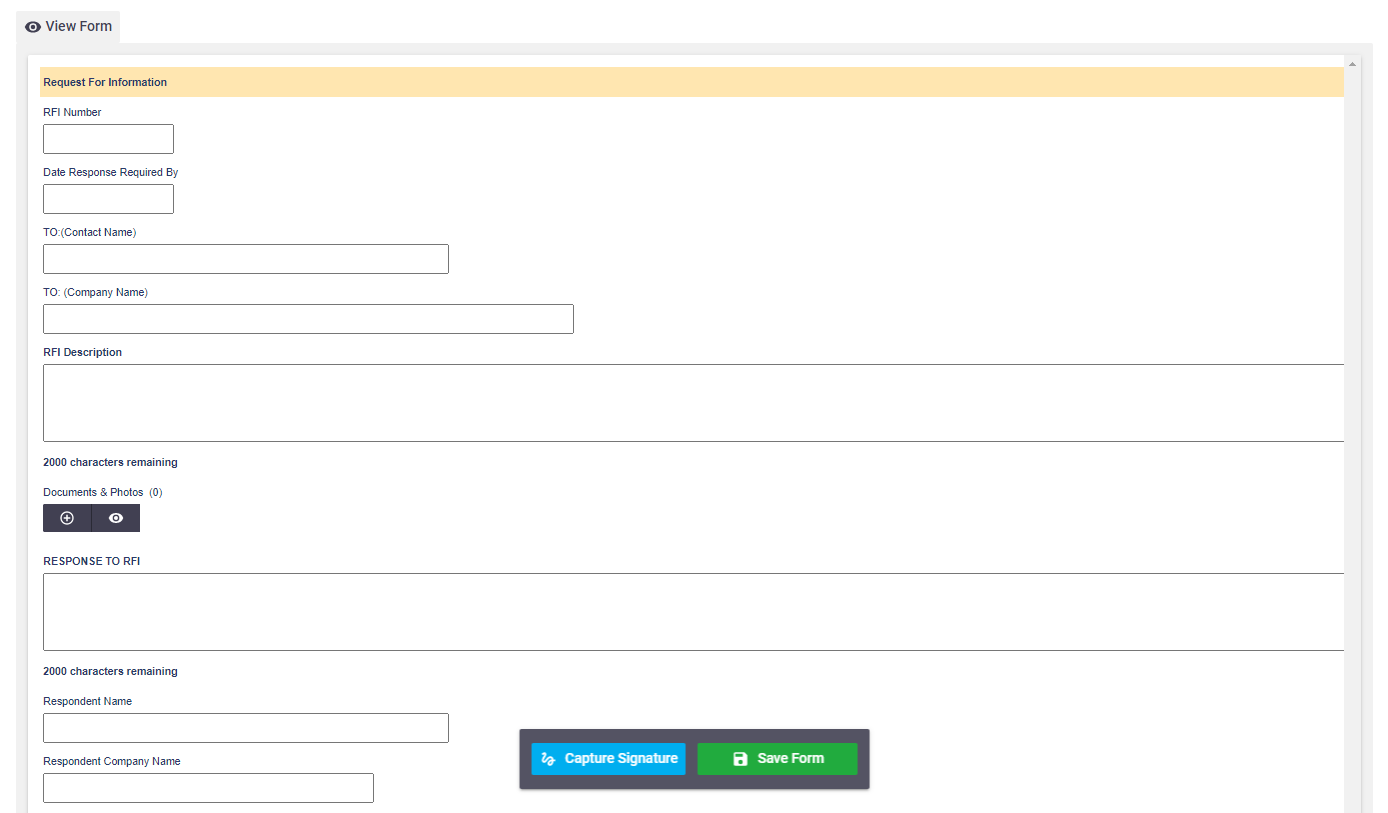
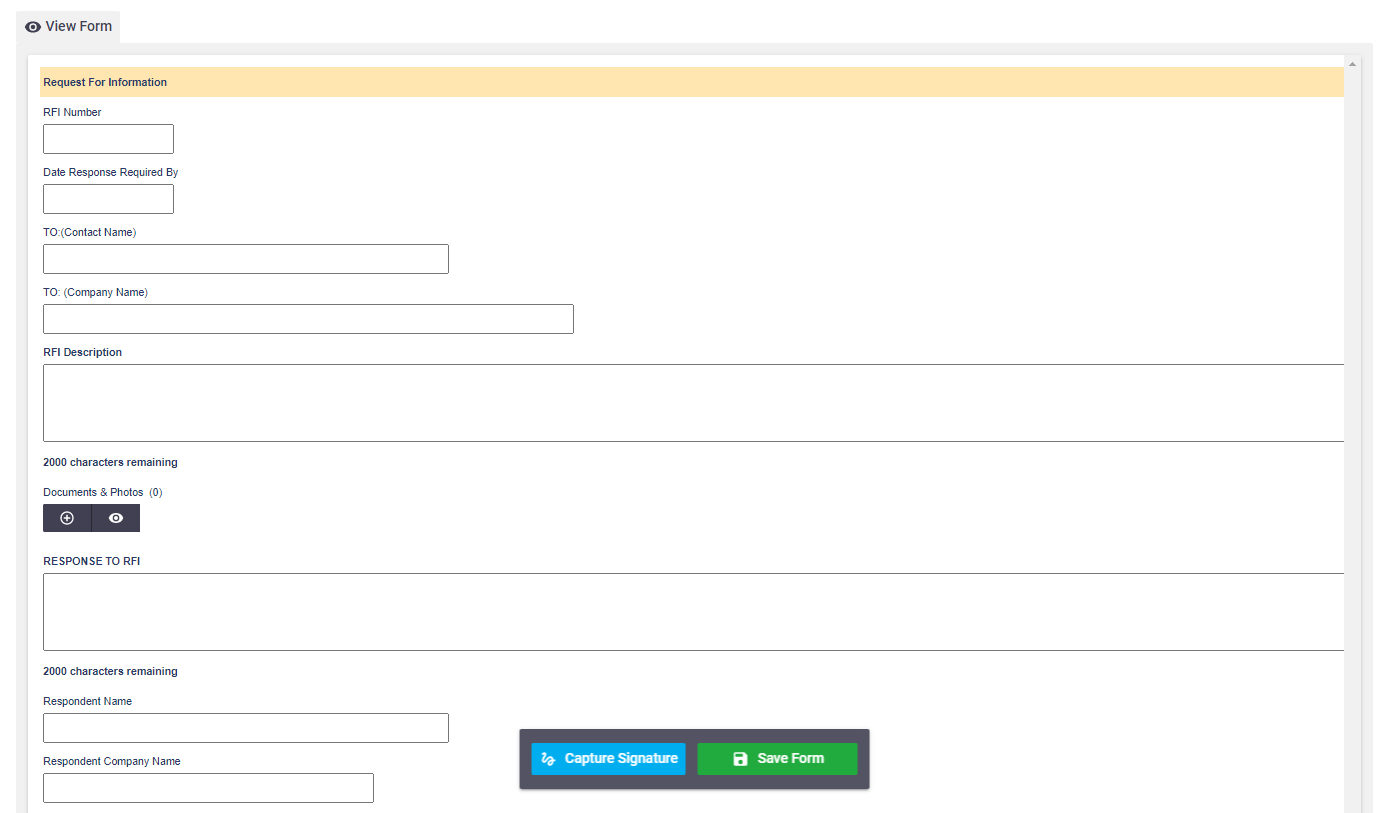
When you're completing the pre-built RFI form in AroFlo, it looks something like this:
PDF
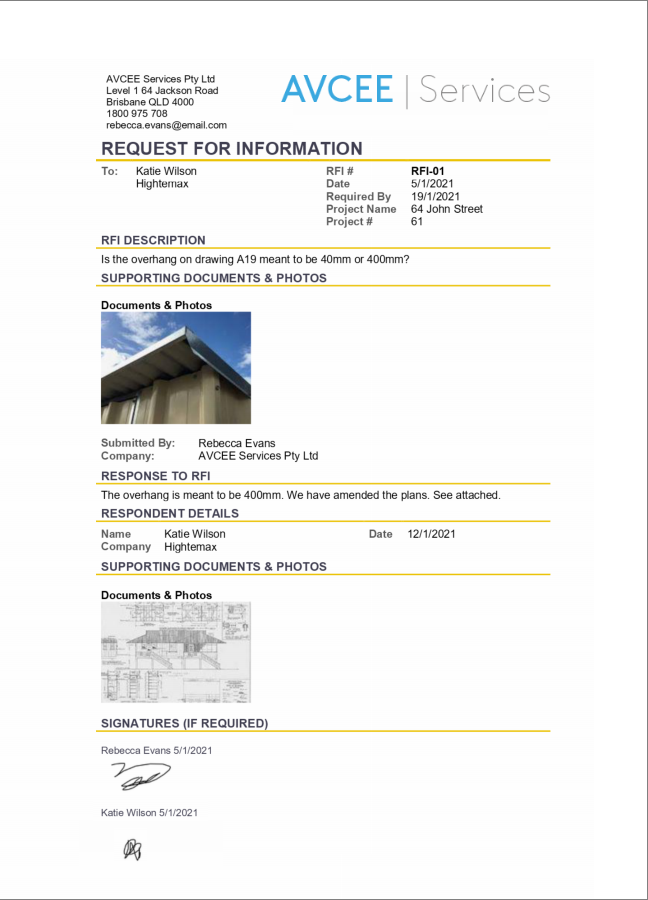
When you save the form as a PDF to email to your respondent, it will look like this:
Show me how to add the RFI form to my AroFlo site
- Go to Site Admin > Compliance > Forms.
- Click Add Pre-built Form.
- Read the disclaimer and click Accept.
- Click the down arrow beside Select Pre-built form to add and select the form entitled Request for Information (RFI).
- Complete the Enter new form name field with your choice of form name.
- Click the magnifier to select the category you want to store the form in.
- Click Add.
Show me how to link the form to the task type
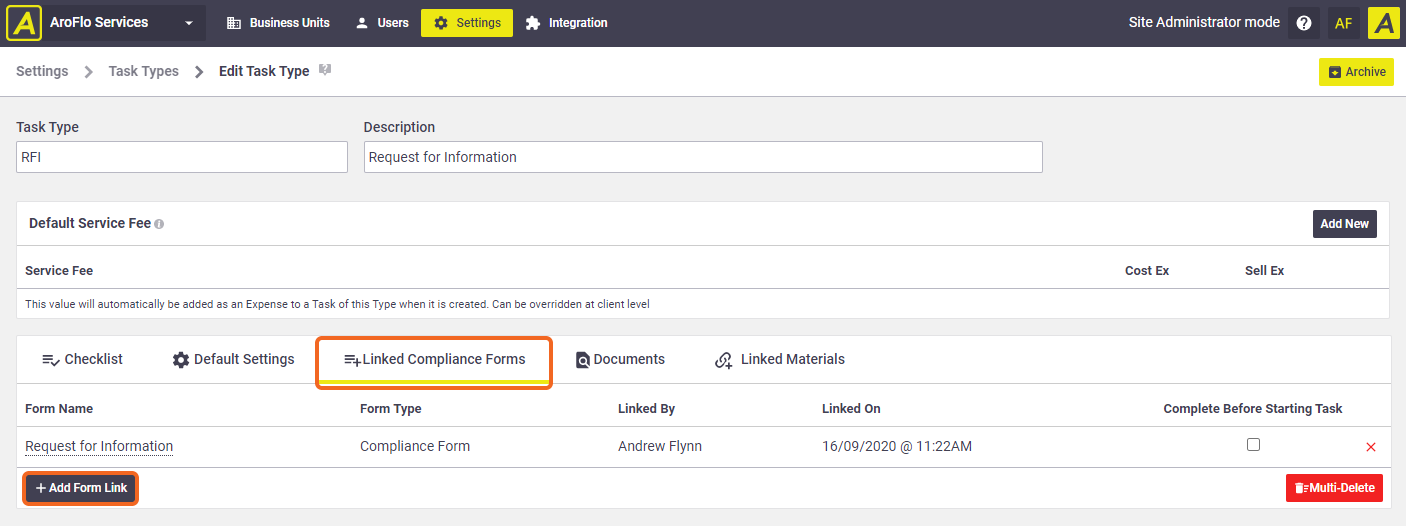
In Site Admin > Settings > Task Types, click the RFI task you just created to open the Edit Task Type screen. On the Linked Compliance Forms tab, click Add Form Link. Select the RFI form and click the X in the top right of the window to close it. Click Save Task Type.
Create an RFI task
Once you've got your RFI task type set up, you're ready to create RFIs within your project. You can decide whether you want to do this:
- within the project stage that the RFI relates to
- in 'no stage', so the RFIs sit outside of the stage-related tasks, or
- within a dedicated 'Variations' stage.
For this example, we're going to create a stage called Variations and create our RFI tasks in there.
Show me how
In AroFlo Office, go to Workflow > Projects > Open and click the project name to open it.
Click Edit Project (top right). Scroll to the bottom of the Stages area (right-hand side) and click Add Stage. In the Stage Name field, enter Variations. If you have Stage Types set up, select the Variations stage type. Click Save Project.
Let's suppose you're working with some plans that indicate an overhang of 40mm. You're pretty sure that should be 400mm but you need confirmation from the architect. You can write up an RFI to explain the problem and record the architect's response.
- In your project, click on the Tasks tab.
- Click Create Task and select Stage: Variations from the dropdown menu.
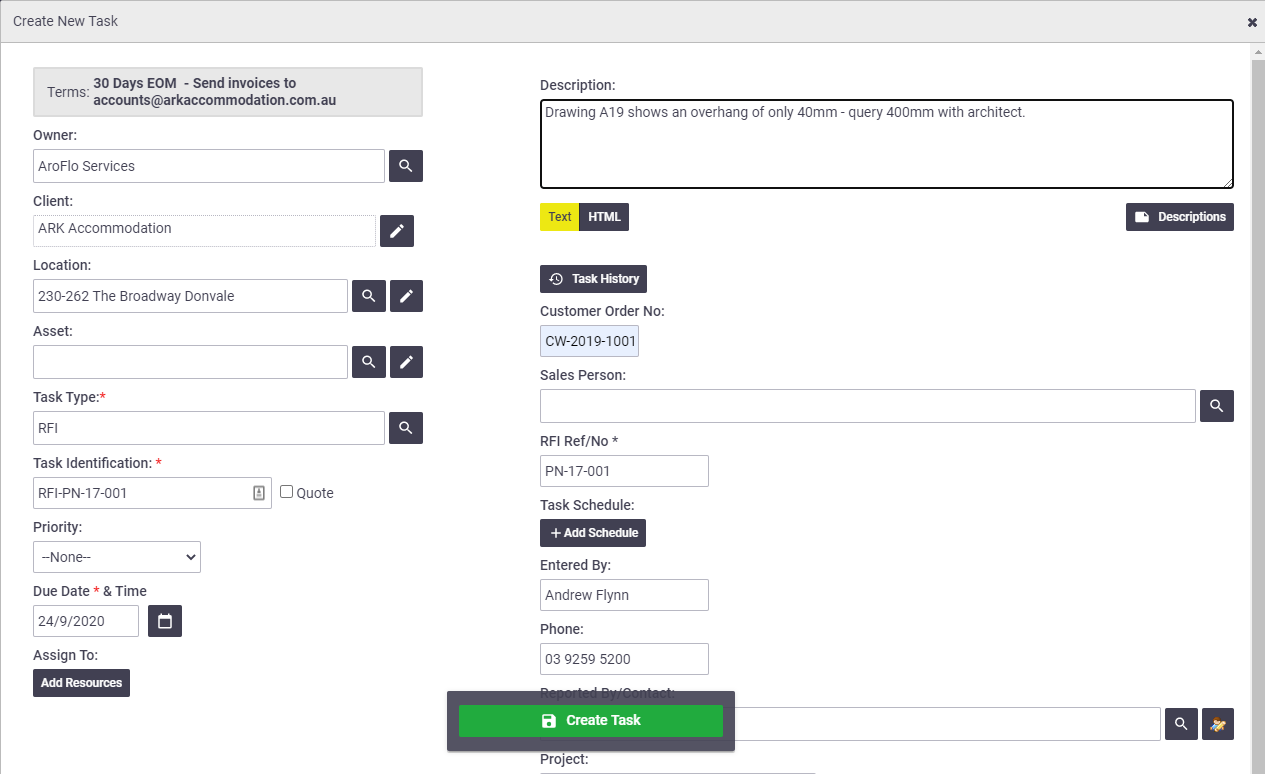
- In the Create New Task window, change the Task Type to RFI. This will give you your RFI custom field and will automatically attach the RFI form and checklist to the task.
- Optional: Enter a Description to explain why the RFI is needed, e.g. Need to query width of overhang.
- Enter a reference number in the RFI Ref/No field. In our example, we'll use the project number - PN-17 - plus a three-digit number unique to this RFI, e.g. 001. You can sort reports on this number. You could also use this number as part of the Task Identification (see image for example).
- Recommended: Mark the task as a Stage Variation.
This will allow you to sort by Variations Only on the project's Progress tab. If you forget to tick Stage Variation when you create the task, you can edit the task header later and tick the Project Task Variation box.
- Click Create Task.
Complete the RFI form
We'll now complete the RFI form and email it to the architect.
The RTF layout attached to the sample AroFlo RFI form automatically pulls information like your company address and contact details, the date, project number and a few other bits and pieces from AroFlo and adds them to the PDF version of the RFI that you email to your respondent. That's why these fields don't appear on the sample RFI form in AroFlo.
Show me how
- Open the RFI task you just created and click the Compliance Forms tab.
- Click Create Form.
- Locate the Request for Information form and click Create.
- Complete all the fields. In the RFI Description field, enter your question or request.
- In the Documents & Photos area, attach any supporting documents and photos.
- Click Create Form > Save Form.
- In the Print Options area, click Email.
- Complete the sending information as described in Send an Email.
Make sure you've ticked Allow Reply Imports, so that your respondent's reply will come straight into AroFlo and be stored against the task. See Import Email Replies for more information.
You can now mark the first three checklist items on your RFI task as Y and click Save Task.
Manage responses
If you've set up your AroFlo site to accept email responses, you can find the reply to your RFI in either of the following places on your RFI task, depending on your email import settings:
- View History
- Task Notes.
.png)
If you need a PDF version of the RFI showing your request and the response:
- Open the RFI task.
- In the Print Options area click View History to access the response to your email.
- Double click to open the email and copy the details you need.
- Close the email and the Search Email History window by clicking the x in the top right corner.
- Click Compliance Forms.
- Click the name of the form you want to add the response to.
- Paste the response into the relevant fields.
- Click Save Form.
- Still in the Compliance Forms tab, click Print PDF.
- Click the link in the Print PDF Document window. The PDF opens and you can download it as necessary.
For quick access to the RFI and its response, you can upload the PDF version to the the Documents & Photos tab on either the task or the project.