The Current Tasks list displays the open tasks accessible to you in the business unit.
You can filter and sort the list in several ways, and also create your own views!

What do the colours mean?
In the default AroFlo theme, tasks highlighted in:
| Colour | Definition |
|---|---|
| Rose | An assigned task that has not been viewed by any of the assigned resources. |
| Yellow | An assigned task that has been viewed by at least one of the assigned resources. |
| Light Blue | A task that has not been viewed by any user from the linked business unit. If a user views the task from a different business unit, it will remain highlighted. |
If you choose another theme, the highlight colours may be different.
Page Features
The following table lists the features of the Current Tasks page.
| Function | Visual | How to use it |
|---|---|---|
| Search |  |
|
| Business Unit Filter |  |
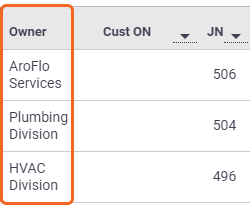
Only available if you have access to multiple Business Units.
Owner field |
| Filter by Status |  |
Click the dropdown menu: You can also create custom task views. See Task Views, below. |
| Filter by date |  |
Click the  (calendar) to select a date range to filter by (Due date). (calendar) to select a date range to filter by (Due date). |
| Email Tasks | |
Send an Email from this view by selecting If an email is sent with a Jobsheet attachment, a record of the email will also be saved against the relevant Task. |
| Search Tags |
|
Filter the task list by selected Tags. You can add tags in the Task Worksheet and use them to link or group similar tasks. Click |
| Bulk Import |
|
Import tasks from an Excel file or a .CSV file. Click |
| Default Ordering |
|
You can re-order the columns by clicking and dragging the column headers. Click |
| Create Task |  |
Quick option to create a task. |
Task List Table Features
The following lists the features of the task list table.
| Function | Visual | How to use it |
|---|---|---|
| Sort |
|
You can sort the list by clicking the arrow |
| Filter | Click the magnifier to filter the list based on what you're searching for, e.g. displaying tasks for specific clients, or filtering the list on priority. | |
| Assigned Column | |
To see all tasks assigned to yourself, click (My). To see all tasks assigned to others: Click the
Multiple Resources Assigned The Assigned (My) column can fit a maximum of three lines of text, so if you assign a task to more than three resources, AroFlo will display the first two names and a link to any others. If only three names are assigned, they will all be listed. |
| Status/Substatus Columns | |
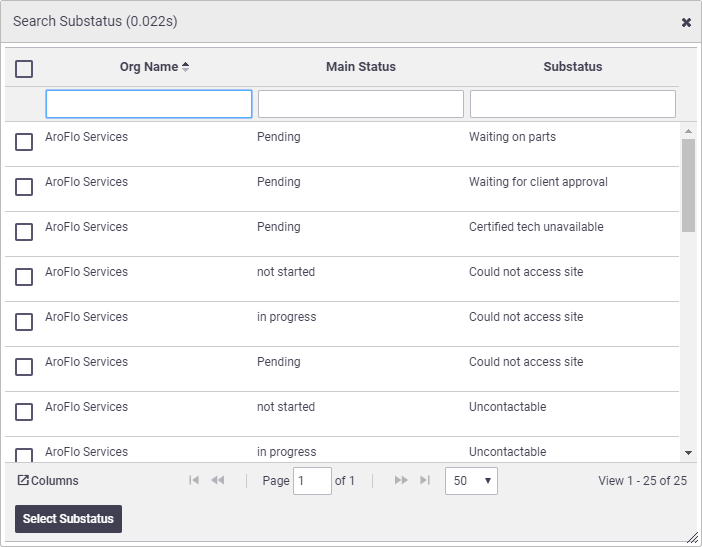
Clicking the arrow next to the word Status/Substatus sorts the list by status/substatus, i.e. all tasks appear and those with a status/substatus are grouped accordingly. You can also filter for tasks with particular statuses/substatuses. Click the Search Substatus window
|
| Scheduled Column |
|
Tasks that have been scheduled will display a schedule date in this column. Tasks that are not currently scheduled will show Set. To see tasks scheduled to yourself only, click (My). Schedule dates shownThis column will display schedule dates from today onwards.
Permission group infoThis includes users in the 'Worker' permission group. For custom permission groups, Site Administrators can check this via Permission Groups > Tasks > Filters > Assigned or Scheduled to User > View (set to ticked) |
| Preview Panel |
|
Click the preview button to reveal a Task Preview with information about a Task. The preview displays essential task information without accessing the whole Task Worksheet. |
| Underlined items |  |
Any text that is underlined is an active link. Generally, this shows all tasks associated with what you've clicked, e.g. clicking a client name displays all tasks belonging to that client. |
| Actions | |
Click the options button |
Task Views
|
You can create your own customised task views using the available filters and columns. You can mix and match the filters and also reorder the columns. Here are a few examples, but the possibilities are endless! Show:
Click the status filter dropdown at the top right to create and manage task list custom views. |
 |
 |
Watch brief video
Create custom view ➕
Your view you just created can now be found within the task views dropdown under ‘Custom’. Default View If you set a view as a default, this will be indicated in the task view list with a |

|
 |
Manage custom views ✏️
|
Click From here, you can:
|
 |
 |
 to either select one or more fields to search on (e.g. Task, Ref No, Job No), or select Full Company Search to search your entire company, not just the current Business Unit.)
 , on the right side of the header to filter the list by the different Task statuses (e.g. Open, Not Started, Pending, Closed, All).


 to the right of any column header (e.g. Type, Client, Status). Clicking the arrow again reverses the order in which the results appear. The arrow indicates which way the list is sorted.
 (magnifier) icon to open the Search Resources window.


