Approve an Invoice
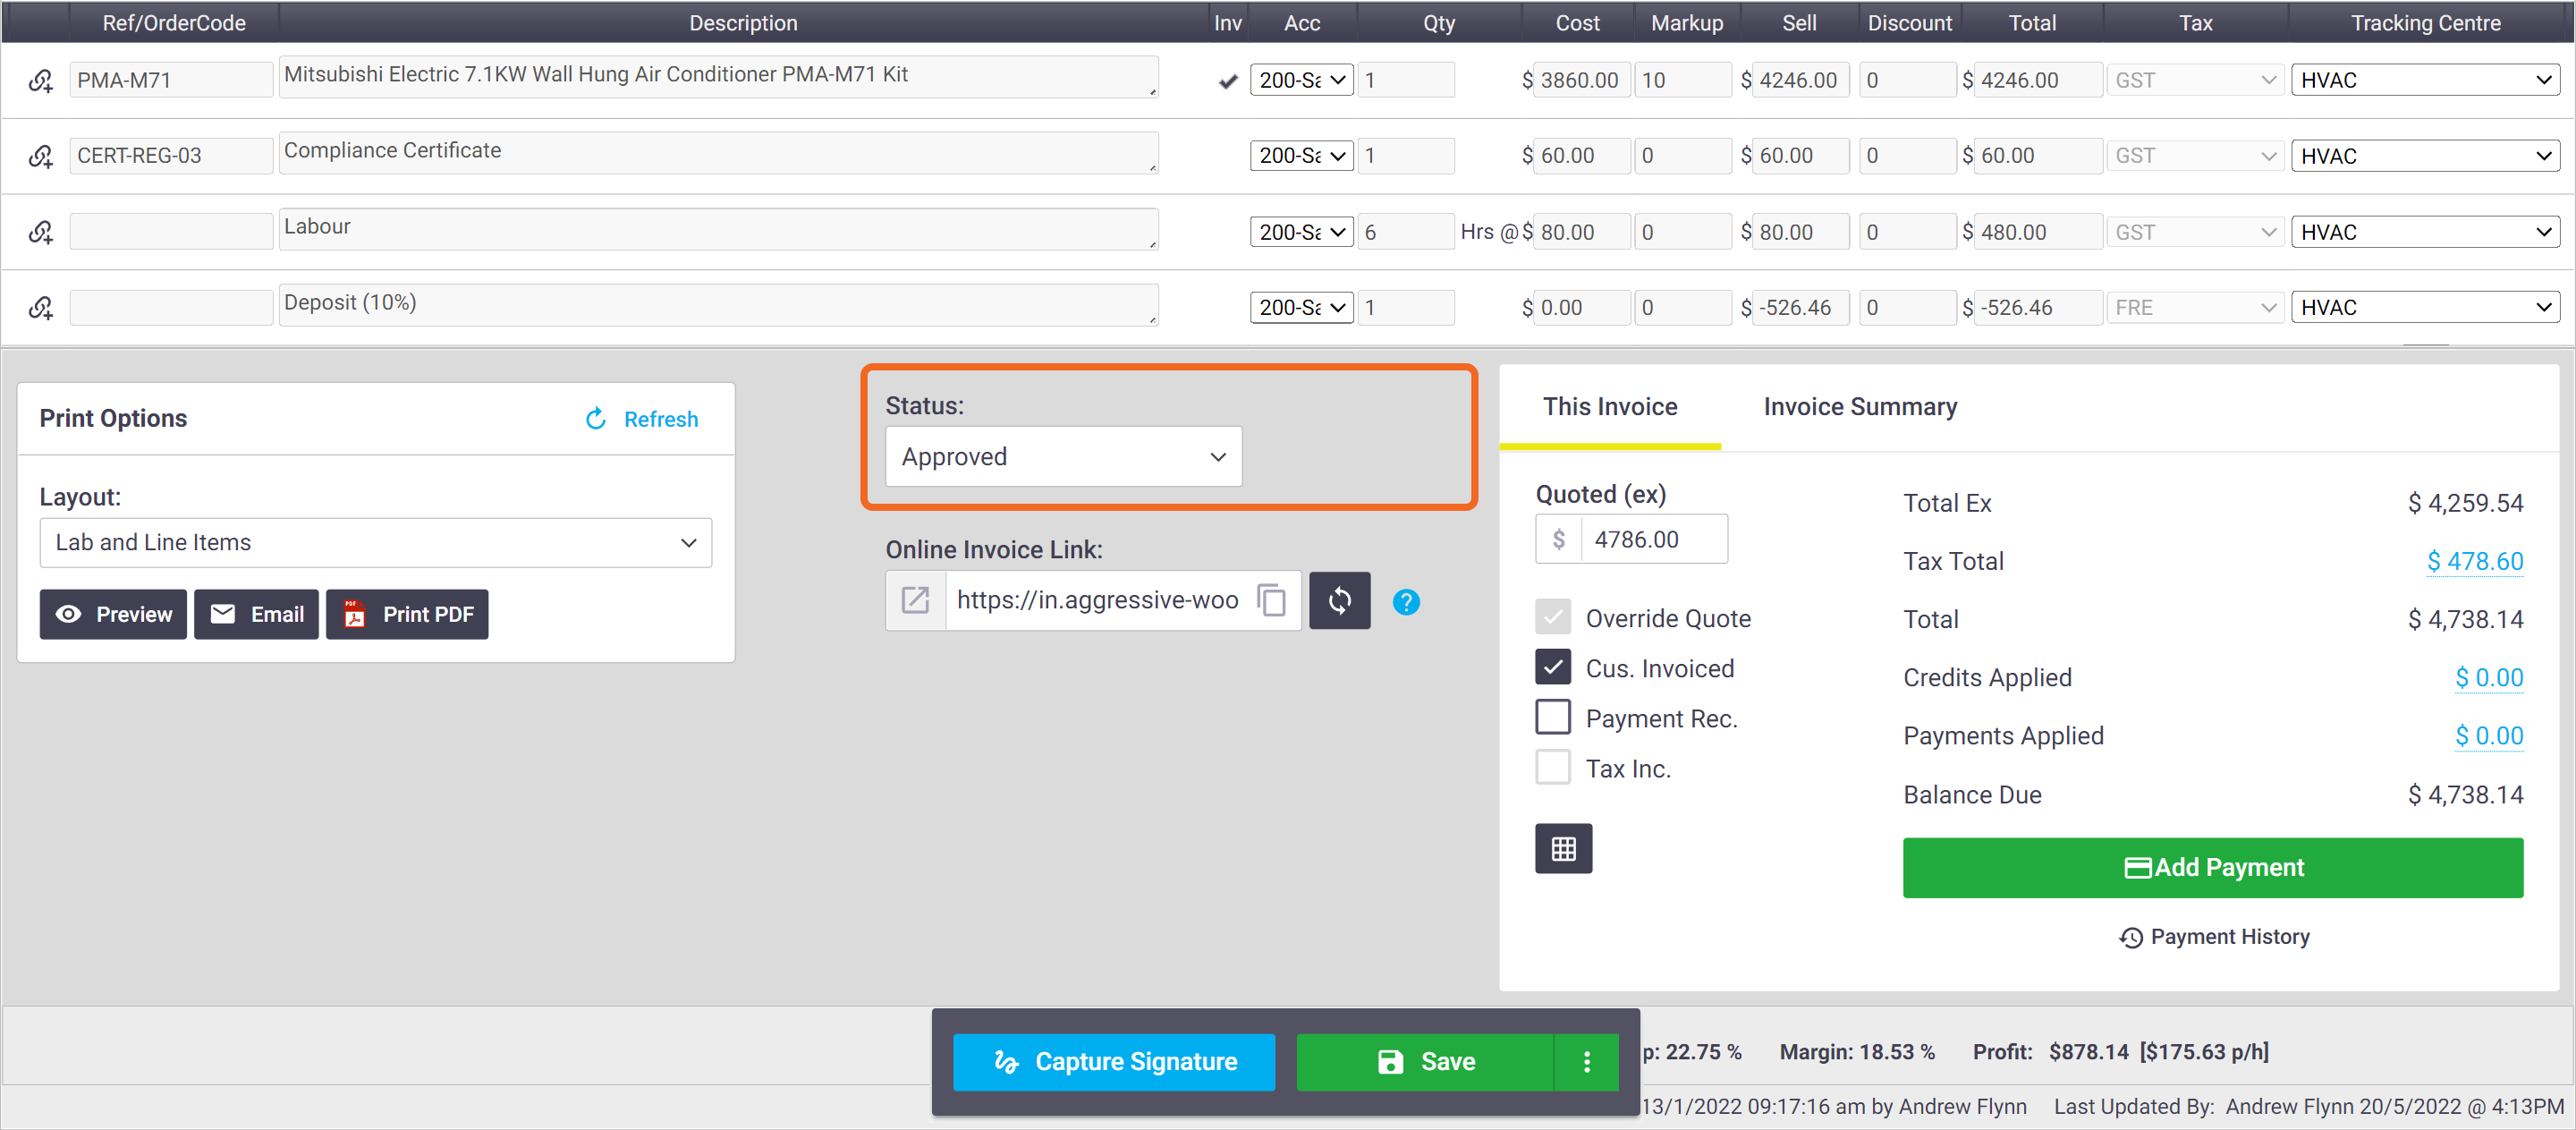
Once your invoice totals are correct, set the Status to Approved and Save the invoice to move it into the 'Approved Invoices' section of your Accounts > Invoices list.
To save time, use the  (three dots) button next to Save and mark the invoice as approved at the same time.
An invoice must be set to Approved before it can be pushed across to your accounting package.

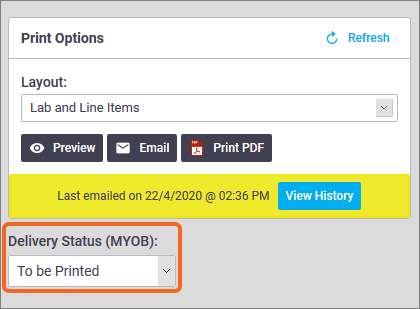
Delivery Status (MYOB)
|
This dropdown menu will only appear if you have an accounting integration with MYOB or MYOB AccountRight Live. Look for it below the Print Options dialog box. This feature relates to the ‘Invoice Delivery’ field in MYOB:  For more information please consult MYOB support. |
 |
 |
Preview an Invoice
|
Use the Print Options section to preview, print or email the invoice. For more information about invoice layouts, see Standard Layouts. To preview an invoice, go to the Print Options (bottom left) and click Preview. |
 |
 |
Saving Invoice Layouts
The Layout field displays the Default Print Layout. If you change the layout and save the invoice, AroFlo will remember the selection if you need it again in the future. The default will also display, just in case you need it.
- Switching the layout from the default works in conjunction with Online Invoices
- You can also customise any of AroFlo's standard layouts. See Custom Layouts.
A preview will appear. If you'd like to use a different layout, select a layout from the dropdown list.

Send an Invoice
When emailing your invoice to your client, you have a couple of options available to you:
Online Invoice
The easiest way to send invoices to your clients is using Online Invoices. Using this method, you send an email to your client, containing a link to the online invoice.
The benefits of using Online Invoices are:
- Clients can pay invoices through AroFlo's external invoice viewer, automatically updating the balance due in AroFlo.
- Clients can ask follow-up questions, which are then recorded in AroFlo.
- You can easily share documents online with your client.
- You'll get notified when a client asks you a question, and your client gets notified when their question is responded to.
See Online Invoices for more information, including how to set this up.
Deposit Invoicing
If you're using Automated Deposit Invoicing and sent your client an Online Quote, they can accept the quote online and immediately access the Online Invoice and pay the deposit. See Automated Deposit Invoicing.

Attached as a PDF
|
Alternatively, you can attach your invoice to an email and send this to your client:
Read more on sending emails. |
 |
 |
Sent Invoices
Once the invoice is sent to the customer, you can indicate this by ticking the Cus. Invoiced checkbox. If you've emailed the invoice from the invoice editor, this will occur automatically.
Any Invoices with Cus. Invoiced ticked will have a  appear on the Accounts > Invoicing views.
