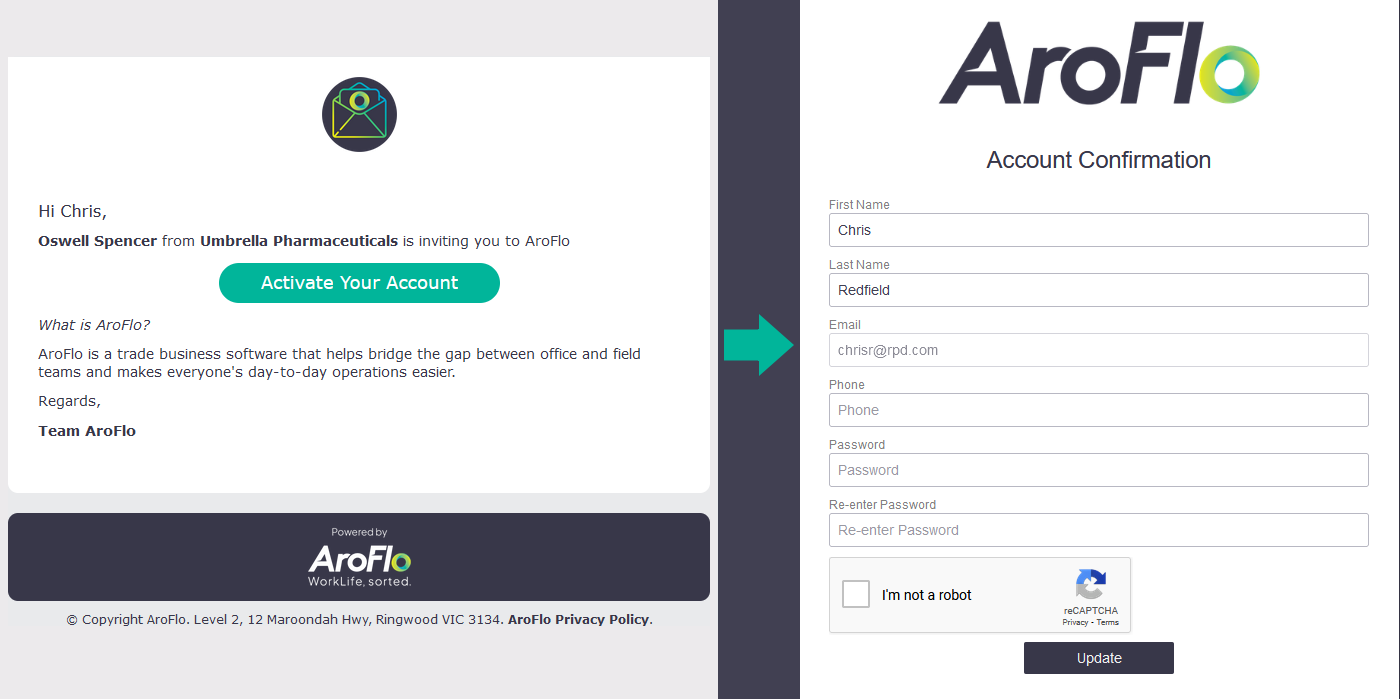
Inviting your intended users to set up their own profile in your AroFlo site is made easy with our User Invite feature.
You can also invite your users during setup of your AroFlo site using the Getting Started Assistant.
Invite your users
|
 |
 |
Create an AroFlo account via email
The user will receive a congratulations email and will be logged in to begin working. |
 |
 |
Why can't I edit the email address in my invitation?
The email address that appears for the user in the portal is un-editable. If this needs to be edited or changed, the sender can amend the email address in the user account as it appears and then use the resending instructions below to try again.
Tracking invite status
After you have invited your users and are waiting for them to set up their profile, you will be notified via Site Administration > Users, as to the current status of their progress. The envelope icon in the status column ( ) will indicate if the recipient has not yet clicked their link and filled out their profile.

Once an icon of a person appears in place of the envelope, the user has finished setting up their profile. The business unit manager will also receive an email confirming the user has completed their sign-up.
If you see an envelope with a strike-out ( ), it means that user has been created through the assistant, but an invite has not been sent.
Resending invitations
Users can have invitations resent if necessary in a couple of different ways through Site Administration > Users:
- Tick the Resend Invite option for each affected user and then hit Save, or
- Click the affected username to open their user card and click Resend Invite from there.

The user can then follow the above steps for filling out their information through the portal.